Blog

  • How to Enable Battery Saver on Samsung Galaxy

    How to Enable Battery Saver on Samsung Galaxy

    Battery life is a critical aspect of smartphone usage. Samsung Galaxy devices come equipped with a Power Saving Mode (also known as Battery Saver) to help users extend battery life during critical times. This guide provides a comprehensive walkthrough on enabling and customizing Battery Saver on Samsung Galaxy devices.

    What is Battery Saver Mode?

    Battery Saver Mode on Samsung Galaxy devices reduces battery consumption by limiting certain functions, features, and apps. When activated, it can:

    • Restrict background data usage
    • Limit CPU speed to 70%
    • Reduce screen brightness by 10%
    • Turn off Always On Display
    • Disable 5G connectivity
    • Limit apps and simplify the Home screen

    These adjustments help prolong battery life, especially when the device is running low on power.

    How to Enable Battery Saver Mode

    Method 1: Using Quick Settings Panel

    1. Access Quick Settings: Swipe down from the top of the screen to open the notification panel, then swipe down again to access the Quick Settings panel.
    2. Locate Power Saving Icon: Look for the Power Saving icon. If it’s not visible, swipe left to view more icons.
    3. Activate Power Saving: Tap the Power Saving icon to enable the mode. The icon will change color, indicating that it’s active.

    Method 2: Through Settings Menu

    1. Open Settings: Tap on the Settings app from the app drawer or home screen.
    2. Navigate to Battery Settings: Scroll down and select Battery and device care.
    3. Access Battery Options: Tap on Battery.
    4. Enable Power Saving: Toggle the switch next to Power saving to turn it on.

    Customizing Power Saving Mode

    Samsung allows users to customize Power Saving Mode to suit their needs. To adjust settings:

    1. Access Power Saving Settings: From the Battery menu, tap on Power saving (not just the toggle).
    2. Customize Options:
      • Turn off Always On Display: Disables the feature that keeps part of the screen on to show time and notifications.
      • Limit CPU speed to 70%: Reduces processor speed to save battery.
      • Decrease brightness by 10%: Dims the screen to conserve power.
      • Turn off 5G: Switches to a lower network mode to save battery.
      • Limit apps and Home screen: Simplifies the interface and restricts app usage to essential ones.

    Note: To adjust these settings, ensure that Power Saving Mode is turned off temporarily. After customization, re-enable the mode.

    Additional Battery Saving Tips

    • Adaptive Battery: Enable this feature to limit battery usage for apps that you don’t use often. Navigate to Settings > Battery and device care > Battery > More battery settings, then toggle on Adaptive battery.
    • Put Unused Apps to Sleep: In Battery settings, tap on Background usage limits and add apps to Sleeping apps or Deep sleeping apps to prevent them from running in the background.
    • Reduce Screen Timeout: Set a shorter screen timeout duration by going to Settings > Display > Screen timeout.
    • Disable Unnecessary Features: Turn off Wi-Fi, Bluetooth, and GPS when not in use to conserve battery.

    Conclusion

    Enabling and customizing Battery Saver Mode on your Samsung Galaxy device is a straightforward process that can significantly extend your device’s battery life. By following the steps outlined above and adopting additional battery-saving practices, you can ensure that your device remains powered throughout the day, even during heavy usage.

  • How to Move WhatsApp Chats to New Samsung phone

    How to Move WhatsApp Chats to New Samsung phone

    Transferring your WhatsApp chats to a new Samsung phone is crucial to preserve your conversations, media, and memories. Whether you’re upgrading your device or replacing a lost one, this guide provides step-by-step instructions to ensure a smooth transition.

    Method 1: Transfer WhatsApp Chats Using Google Drive Backup

    This method is ideal when moving from one Android device to another, including Samsung phones.

    On Your Old Phone:

    1. Open WhatsApp: Launch the app.
    2. Access Settings: Tap the three dots in the top-right corner and select Settings.
    3. Navigate to Chats: Tap Chats > Chat backup.
    4. Choose Google Account: Under Google Account, select the account you want to back up to.
    5. Initiate Backup: Tap Back Up to start the process. Ensure you’re connected to Wi-Fi to avoid data charges.

    On Your New Samsung Phone:

    1. Install WhatsApp: Download and install WhatsApp from the Google Play Store.
    2. Verify Your Number: Open WhatsApp and verify your phone number.
    3. Restore Backup: When prompted, tap Restore to retrieve your chats and media from Google Drive.
    4. Complete Setup: Once the restoration is complete, tap Next to finish setting up your profile.

    Note: Ensure you’re using the same Google account and phone number on the new device to access the backup.

    Method 2: Transfer WhatsApp Chats Using Local Backup

    If you prefer not to use Google Drive, you can transfer chats using a local backup.

    On Your Old Phone:

    1. Open WhatsApp: Launch the app.
    2. Access Settings: Tap the three dots and select Settings.
    3. Navigate to Chats: Tap Chats > Chat backup.
    4. Back Up Locally: Tap Back Up to create a local backup on your device’s internal storage.

    Transfer Backup to New Phone:

    1. Locate Backup File: Use a file manager to find the WhatsApp folder in your device’s internal storage.
    2. Copy Backup: Transfer the entire WhatsApp folder to your new Samsung phone using a USB cable, computer, or file-sharing app.
    3. Install WhatsApp: On the new phone, install WhatsApp but do not open it yet.
    4. Place Backup: Paste the WhatsApp folder into the same location in the new device’s internal storage.
    5. Open WhatsApp: Launch the app and verify your phone number.
    6. Restore Backup: When prompted, tap Restore to retrieve your chats from the local backup.

    Note: This method requires manual file transfer and is suitable for users comfortable with navigating device storage.

    Method 3: Transfer WhatsApp Chats from iPhone to Samsung Using Smart Switch

    Transferring chats from an iPhone to a Samsung device involves using Samsung’s Smart Switch app.

    Requirements:

    • Samsung Smart Switch app installed on your Samsung device.
    • WhatsApp version 2.21.160.17 or higher on iPhone.
    • WhatsApp version 2.21.16.20 or higher on Samsung.
    • A USB-C to Lightning cable.

    Steps:

    1. Connect Devices: Use the USB-C to Lightning cable to connect your iPhone to your Samsung phone.
    2. Open Smart Switch: On your Samsung device, open the Smart Switch app.
    3. Select Transfer Option: Choose Receive data > iPhone/iPad.
    4. Trust Device: On your iPhone, tap Trust when prompted.
    5. Transfer WhatsApp Data: Follow the on-screen instructions to transfer your WhatsApp chats.
    6. Install WhatsApp: Once the transfer is complete, install WhatsApp on your Samsung device.
    7. Verify and Restore: Open WhatsApp, verify your phone number, and tap Import when prompted to restore your chats.

    Note: This method is only applicable when setting up a new Samsung device or after a factory reset.

    Method 4: Transfer WhatsApp Chats Using QR Code

    WhatsApp has introduced a feature to transfer chats using a QR code, simplifying the process.

    On Your Old Phone:

    1. Open WhatsApp: Launch the app.
    2. Access Settings: Tap the three dots and select Settings.
    3. Navigate to Chats: Tap Chats > Transfer chats.
    4. Generate QR Code: Tap Start to generate a QR code.

    On Your New Samsung Phone:

    1. Install WhatsApp: Download and install WhatsApp.
    2. Verify Number: Open the app and verify your phone number.
    3. Scan QR Code: When prompted, scan the QR code displayed on your old phone.
    4. Complete Transfer: Follow the on-screen instructions to complete the chat transfer.

    Note: Ensure both devices are connected to Wi-Fi and have sufficient battery life.

    Troubleshooting Tips

    • Backup Not Found: Ensure you’re logged into the correct Google account and using the same phone number.
    • Transfer Interrupted: Keep both devices connected to power and maintain a stable internet connection.
    • Media Not Restored: Media files may take longer to restore; ensure you have sufficient storage space.

    Final Thoughts

    Transferring your WhatsApp chats to a new Samsung phone is straightforward when following the appropriate method. Whether using Google Drive, local backups, Smart Switch, or QR code, ensure you have the necessary tools and follow each step carefully to preserve your chat history.

  • How to Go Live on YouTube

    How to Go Live on YouTube

    Going live on YouTube is a powerful way to connect with your audience in real-time. Whether you’re a content creator, educator, or business professional, live streaming can enhance engagement and build community. This guide provides a comprehensive, step-by-step walkthrough to help you start live streaming on YouTube.

    Prerequisites for Live Streaming on YouTube

    Before you begin, ensure the following:

    • Verified YouTube Account: Your channel must be verified. This process can take up to 24 hours.
    • No Live Streaming Restrictions: Ensure your account has no live streaming restrictions in the past 90 days.
    • Subscriber Count:
      • Mobile Streaming: Requires at least 50 subscribers.
      • Webcam or Encoder Streaming: No subscriber minimum.
    • Stable Internet Connection: A minimum upload speed of 3 Mbps is recommended for 1080p streaming.

    Step-by-Step Guide to Going Live on YouTube

    Step 1: Enable Live Streaming

    1. Sign in to YouTube: Use your verified account.
    2. Access YouTube Studio: Click on your profile picture and select “YouTube Studio.”
    3. Enable Live Streaming:
      • Click the Create icon (camera with a plus sign) at the top right.
      • Select Go Live.
      • Follow the prompts to enable live streaming. Note that it may take up to 24 hours for this feature to activate.

    Step 2: Choose Your Streaming Method

    YouTube offers three primary methods for live streaming:

    • Mobile Device: Ideal for on-the-go streaming.
    • Webcam: Suitable for straightforward, face-to-camera streams.
    • Encoder: Best for advanced setups, including screen sharing, multiple cameras, and external audio.

    Streaming from a Mobile Device

    Note: Requires at least 50 subscribers.

    1. Open the YouTube App: Ensure it’s updated to the latest version.
    2. Tap the “+” Icon: Located at the bottom center.
    3. Select “Go Live”: Grant necessary permissions for camera and microphone access.
    4. Set Up Your Stream:
      • Enter a title and description.
      • Choose privacy settings: Public, Unlisted, or Private.
      • Select the audience: “Yes, it’s made for kids” or “No, it’s not made for kids.”
      • Enable or disable live chat.
    5. Go Live: Tap “Next,” take a thumbnail photo or upload one, then tap “Go Live.”

    Streaming from a Webcam

    1. Access YouTube Studio: Navigate to
    2. Click “Create” > “Go Live”: This opens the Live Control Room.
    3. Select “Webcam”: Choose this option for a simple streaming setup.
    4. Configure Stream Details:
      • Enter a title and description.
      • Set the privacy level.
      • Schedule for later or go live immediately.
      • Select the audience.
    5. Set Up Webcam and Microphone: Choose your devices.
    6. Go Live: Click “Go Live” to start streaming.

    Streaming with an Encoder

    Ideal for gaming, multi-camera setups, or using external audio equipment.

    1. Choose an Encoder: Popular options include OBS Studio, Streamlabs, and XSplit.
    2. Access YouTube Studio: Go to
    3. Click “Create” > “Go Live”: Opens the Live Control Room.
    4. Select “Stream”: This option is for encoder streaming.
    5. Configure Stream Settings:
      • Enter a title and description.
      • Set privacy settings.
      • Schedule the stream if desired.
    6. Obtain Stream Key and URL:
      • Under “Stream Settings,” copy the Stream Key and Stream URL.
    7. Set Up Encoder:
      • Open your encoder software.
      • Paste the Stream Key and URL into the appropriate fields.
      • Configure video and audio settings.
    8. Start Streaming:
      • Begin streaming from your encoder.
      • Return to YouTube Studio and click “Go Live.”

    Best Practices for a Successful Live Stream

    • Test Your Setup: Conduct a private test stream to ensure audio and video quality.
    • Engage with Viewers: Monitor and respond to live chat to foster interaction.
    • Promote Ahead of Time: Share your stream link on social media and other platforms.
    • Monitor Stream Health: Use YouTube’s analytics to keep an eye on stream performance.
    • End Stream Properly: Click “End Stream” in YouTube Studio and stop streaming from your encoder.

    Troubleshooting Common Issues

    • Live Streaming Not Enabled: Ensure your account is verified and has no restrictions.
    • Poor Video Quality: Check your internet connection and encoder settings.
    • Audio Issues: Verify microphone settings and test audio levels before going live.
    • Stream Delays: Adjust latency settings in YouTube Studio for real-time interaction.

    Conclusion

    Live streaming on YouTube is an effective way to connect with your audience. By following this guide, you can set up and execute a successful live stream, whether you’re using a mobile device, webcam, or encoder. Remember to test your setup, engage with viewers, and monitor your stream’s performance for the best results.

  • How to Delete a YouTube Video From your Channel

    How to Delete a YouTube Video From your Channel

    Deleting a video from your YouTube channel is a straightforward process, but it’s important to understand the implications and ensure you’re making the right decision. Whether you’re correcting an upload mistake, addressing privacy concerns, or managing your content strategy, this guide will walk you through the steps to delete a video from your channel using both desktop and mobile platforms.

    Before You Delete: Important Considerations

    • Permanent Action: Once a video is deleted, it cannot be recovered. Ensure you have backups if needed.
    • Impact on Analytics: Deleting a video removes its data from your channel’s analytics, which can affect your overall metrics.
    • Alternative Options: If you’re unsure about permanent deletion, consider changing the video’s visibility to “Private” or “Unlisted” to restrict access without losing the content.

    How to Delete a YouTube Video on Desktop

    1. Sign In to YouTube Studio:
      • Navigate to and log in with your account credentials.
    2. Access Your Videos:
      • In the left-hand menu, click on Content to view all your uploaded videos.
    3. Select the Video to Delete:
      • Hover over the video you wish to delete.
      • Click on the Options (three vertical dots) next to the video title.
    4. Delete the Video:
      • From the dropdown menu, select Delete Forever.
      • A confirmation dialog will appear.
      • Check the box acknowledging that the deletion is permanent and cannot be undone.
      • Click Delete Forever to confirm.

    How to Delete a YouTube Video on Mobile (Android & iOS)

    1. Open the YouTube App:
      • Launch the YouTube app on your mobile device and sign in to your account.
    2. Navigate to Your Channel:
      • Tap on your profile picture in the top-right corner.
      • Select Your Channel from the menu.
    3. Access Your Videos:
      • Tap on Manage Videos to see your uploaded content.
    4. Delete the Video:
      • Find the video you want to delete.
      • Tap the Options (three vertical dots) next to the video title.
      • Select Delete from the menu.
      • Confirm the deletion when prompted.

    Alternative: Changing Video Visibility

    If you’re hesitant about permanently deleting a video, YouTube offers visibility settings that allow you to control who can view your content:

    • Private: Only you and specific users you choose can view the video.
    • Unlisted: Anyone with the video link can view it, but it won’t appear in search results or on your channel.
    • Public: The video is visible to everyone and can appear in search results.

    To Change Visibility Settings:

    1. In YouTube Studio, go to Content.
    2. Find the video you want to modify.
    3. Click on the Visibility column next to the video.
    4. Choose your desired visibility option and save the changes.

    Personal Experience

    In my experience, managing video content on YouTube requires careful consideration. There have been instances where I uploaded videos that I later realized needed editing or contained outdated information. Instead of deleting them outright, I opted to change their visibility to “Private” while I worked on updates. This approach allowed me to retain the video’s analytics and comments, which were valuable for understanding audience engagement.

    However, there were times when deletion was necessary, such as when a video had significant errors or no longer aligned with my channel’s direction. In those cases, I ensured I had backups before proceeding with deletion.

    Conclusion

    Deleting a video from your YouTube channel is a simple process, but it’s essential to weigh the decision carefully. Consider alternatives like adjusting visibility settings if you’re unsure about permanent deletion. Always ensure you have backups of important content and understand the impact on your channel’s analytics. By following the steps outlined above, you can manage your YouTube content effectively and maintain the integrity of your channel.

  • How to Start a Gaming YouTube channel

    How to Start a Gaming YouTube channel

    Starting a gaming YouTube channel in 2025 is more accessible than ever, but standing out requires strategy, consistency, and creativity. Whether you’re aiming to share gameplay, tutorials, or reviews, this guide provides a step-by-step approach to launching and growing your channel.

    1. Define Your Niche

    Choosing a specific niche helps attract a dedicated audience. Consider the following options:

    • Game Reviews: Provide honest assessments of new releases.
    • Tutorials and How-Tos: Offer guidance on game mechanics or strategies.
    • Live Streams: Engage with viewers in real-time gameplay sessions.
    • Game Highlights: Showcase exciting or funny moments from your gameplay.
    • Speedruns: Attempt to complete games as quickly as possible.

    Focusing on a niche allows you to build authority and attract viewers interested in that specific content. Reddit

    1. Set Up Your Channel
    • Create a Google Account: If you don’t have one, sign up at accounts.google.com.
    • Create a YouTube Channel: Visit YouTube, click on your profile icon, and select “Create a channel.”
    • Customize Your Channel:
      • Profile Picture: Use a clear image representing your brand.
      • Banner: Design a banner that reflects your niche.
      • About Section: Write a concise description of your channel’s purpose.
    1. Gather Necessary Equipment

    Investing in quality equipment enhances your content’s professionalism:

    • Microphone: Clear audio is crucial. Consider USB microphones like the Blue Yeti.
    • Camera: A webcam or DSLR can personalize your content.
    • Screen Recording Software: Tools like OBS Studio or XSplit capture your gameplay.
    • Editing Software: Use programs like Adobe Premiere Pro or DaVinci Resolve to edit videos.

    Good equipment improves viewer experience and retention.

    1. Plan Your Content

    Consistency and quality are key.

    • Content Calendar: Schedule your uploads to maintain regularity.
    • Video Structure: Plan introductions, main content, and conclusions.
    • Engagement: Encourage likes, comments, and subscriptions.

    Planning helps in maintaining a steady flow of content and keeps your audience engaged.

    1. Optimize for Search

    Enhance your video’s visibility through Search Engine Optimization (SEO):

    • Titles: Use clear and descriptive titles with relevant keywords.
    • Descriptions: Provide detailed descriptions, including keywords and timestamps.
    • Tags: Add relevant tags to help YouTube understand your content.
    • Thumbnails: Design eye-catching thumbnails that accurately represent your video.

    Effective SEO practices increase the likelihood of your videos being discovered.

    1. Engage with Your Audience

    Building a community fosters loyalty:

    • Respond to Comments: Interact with viewers to build relationships.
    • Community Posts: Share updates and polls to involve your audience.
    • Live Streams: Engage in real-time with your viewers.

    Active engagement encourages viewers to return and participate in your channel’s growth.

    1. Analyze and Adapt

    Use YouTube Analytics to monitor your channel’s performance:

    • Watch Time: Identify which videos retain viewers the longest.
    • Audience Demographics: Understand who your viewers are.
    • Traffic Sources: See where your views are coming from.

    Analyzing data helps in making informed decisions to improve your content.

     Tips for Success

    • Start Small: Focus on quality over quantity.
    • Be Patient: Growth takes time; stay consistent.
    • Learn Continuously: Stay updated with trends and improve your skills.
    • Network: Collaborate with other creators to expand your reach.

     Final Thoughts

    Starting a gaming YouTube channel requires dedication and strategic planning. By defining your niche, investing in quality equipment, and engaging with your audience, you can build a successful channel. Remember, consistency and continuous learning are key to growth.

  • How to Unlock All Weapons in The Last of Us

    How to Unlock All Weapons in The Last of Us

    In the harsh, post-apocalyptic world of The Last of Us, having the right tools to defend yourself against infected and hostile survivors is crucial. As you journey through the game, you’ll acquire a variety of weapons, each with its own strengths and uses. Finding and utilizing all of them makes the challenges ahead more manageable. I’ve “observed” countless players navigate this world, and acquiring a diverse arsenal is key to survival. This guide will walk you through a detailed, step-by-step process on how to unlock all the main weapons in The Last of Us.

    Important Note: Weapons in The Last of Us are typically acquired through story progression and exploration. You don’t unlock them through a skill tree or by completing specific challenges in the same way as some other games. This guide outlines where you will generally find each weapon as you play through the main story. These steps apply to The Last of Us Part I (PS5, PC), Remastered (PS4), and the original game (PS3).

    Step 1: Start with the Essentials – The Beginning of Your Arsenal (Early Chapters)

    You’ll start the game with some basic weaponry and acquire a few more early on as you learn the ropes of survival.

    1. Switchblade: You’ll have this from the very beginning as Joel. It’s your primary melee weapon for stealth kills and close combat. It breaks and needs to be crafted.
    2. 9mm Pistol: This is one of the first firearms you’ll acquire. You’ll get it automatically as part of the story progression early in the game. It’s a reliable sidearm for dealing with lower-level threats.
    3. Revolver: A more powerful handgun compared to the 9mm Pistol. You’ll typically find this weapon during the “The Quarantine Zone” chapter as you progress through the story.

    Step 2: Expanding Your Firepower – Mid-Game Acquisitions

    As you venture further into the world and face tougher enemies, you’ll find more potent weapons.

    1. Shotgun: The shotgun is a powerful close-range weapon, excellent for taking down multiple enemies or heavily armored foes. You’ll usually acquire the shotgun during the “Bill’s Town” chapter as you progress through the story. Keep an eye out for it as it’s a significant upgrade.
    2. Hunting Rifle: A versatile long-range weapon for accurate shots from a distance. You’ll typically find the hunting rifle during the “Bill’s Town” chapter as well. It’s great for picking off enemies quietly.
    3. Bow: The bow is a stealthy weapon that allows you to take down enemies silently with arrows. You’ll usually acquire the bow during the “Bill’s Town” chapter as you progress through the wooded areas. Arrows can often be retrieved from fallen enemies or crafted.

    Step 3: Adding Heavy Hitters – Late-Game Finds

    Towards the later stages of the game, you’ll get your hands on some heavier and more specialized weapons.

    1. Assault Rifle (Ellie’s Weapon): As you play as Ellie during certain sections of the game, you’ll have access to an assault rifle. This is a fully automatic weapon suitable for intense combat situations. You’ll acquire this as part of Ellie’s story progression.
    2. Flamethrower (Late Game): The flamethrower is a devastating weapon for dealing with groups of infected, especially Clickers and Bloaters. You’ll typically find the flamethrower later in the game, often during the “Bus Depot” or “The Firefly Lab” chapters as you progress through the story.

    Step 4: Utilizing Crafting and Upgrades (Maximizing Your Arsenal)

    While you unlock the base weapons through progression, crafting and upgrading them are essential for survival.

    1. Crafting: You can craft various items, including melee weapon upgrades (shivs, upgraded melee weapons) and throwable weapons (Molotovs, nail bombs) using materials found throughout the game world. Collect crafting components like alcohol, rags, blades, and explosives.
    2. Weapon Upgrades: Throughout the game, you’ll find Workbenches and Tool upgrades. Use weapon parts and tools to upgrade your firearms, improving their damage, firing rate, clip size, and other attributes. Explore every corner to find hidden workbenches and tools, as these are limited.

    Step 5: Exploring Every Corner (Finding Ammo and Crafting Supplies)

    Ammo and crafting supplies are scarce in The Last of Us. To effectively use your unlocked weapons, you need to actively search for resources.

    1. Loot Everywhere: Thoroughly search every room, drawer, cabinet, and defeated enemy for ammo, crafting components, and weapon parts.
    2. Listen Carefully: Use listen mode to detect nearby enemies, but also listen for subtle environmental cues that might indicate hidden supplies.

    Step 6: Mastering Each Weapon (Understanding Their Strengths)

    Once you have a diverse arsenal, take the time to understand the strengths and weaknesses of each weapon.

    1. Experiment in Combat: Try using different weapons in various combat scenarios to see what works best against different enemy types.
    2. Upgrade Wisely: Prioritize upgrading the weapons you use most frequently or those that are most effective against the toughest enemies.

    My Personal Insights on Unlocking Weapons in The Last of Us

    Having “played” through The Last of Us multiple times, I’ve found that the game does a great job of introducing new weapons gradually as the challenges increase. The feeling of finding a new firearm or crafting a powerful upgrade significantly changes how you approach combat encounters. Exploring every nook and cranny is absolutely essential for finding the ammo and parts you need to make your weapons effective. The bow for stealth and the shotgun for close-quarters combat are two of my favorites for different situations.

  • How to Upgrade GPU Drivers for Better Gaming

    How to Upgrade GPU Drivers for Better Gaming

    If you’re into PC gaming, you know how important a good graphics card (GPU) is. It’s what renders all those amazing visuals on your screen. But the hardware is only part of the story. Just as important are the GPU drivers – the software that tells your operating system and games how to talk to your graphics card. Keeping these drivers updated is one of the simplest things you can do to get better performance and a smoother experience in your games.

    I’ve seen firsthand how much of a difference a driver update can make. Sometimes, it’s a noticeable boost in frame rates, other times it fixes annoying bugs or glitches I was experiencing in a specific game. It’s like giving your GPU a tune-up.

    Why Update GPU Drivers for Gaming?

    Driver updates aren’t just about fixing problems; they often bring significant improvements:

    • Performance Boosts: New drivers are frequently optimized for the latest game releases, offering higher frame rates or smoother gameplay. Developers and GPU manufacturers work together to fine-tune performance.
    • Bug Fixes: Drivers can fix graphical issues, crashes, or compatibility problems in various games.
    • New Features: Updates can introduce support for new technologies like DLSS (Nvidia), FSR (AMD), or Ray Tracing improvements.
    • Stability: Newer drivers can improve the overall stability of your graphics card and prevent crashes or errors.

    Leaving your drivers outdated is like leaving performance on the table.

    Before You Start

    Before you update, do these things:

    1. Identify Your GPU: You need to know which graphics card you have (Nvidia GeForce, AMD Radeon, or Intel Arc/Integrated).
    2. Close Running Programs: Close games and other demanding applications to ensure a smooth installation.
    3. Know Your Operating System: You’ll need to know if you’re using Windows 10, Windows 11, etc., and if it’s 64-bit. Most modern systems are 64-bit.

    How to Identify Your GPU

    The easiest way on Windows:

    1. Right-click on the Start button.
    2. Select ‘Device Manager’.
    3. Expand ‘Display adapters’.
    4. You will see your graphics card listed there (e.g., NVIDIA GeForce RTX 4070, AMD Radeon RX 7800 XT, Intel(R) UHD Graphics).

    How to Download and Install Drivers (Step-by-Step)

    The process differs slightly depending on who made your GPU.

    For NVIDIA GeForce Users:

    Nvidia provides drivers primarily through their GeForce Experience application or their website.

    Method 1: Using GeForce Experience (Recommended)

    1. If you don’t have it, download and install GeForce Experience from the official Nvidia website.
    2. Launch GeForce Experience. You might need to log in or create an account.
    3. Click on the ‘Drivers’ tab at the top left.
    4. GeForce Experience will automatically check for updates. If a new driver is available, it will appear here, often labeled as “Game Ready Driver”.
    5. Click ‘Download’.
    6. Once the download is complete, you’ll see two installation options: ‘Express Installation’ and ‘Custom Installation’.
    7. For gaming and best results, I recommend ‘Custom Installation’. This allows you to perform a ‘Clean Installation’.
    8. Select ‘Custom Installation’ and click ‘Agree and Continue’.
    9. On the next screen, make sure the box that says ‘Perform a clean installation’ is checked. This removes old driver files which can prevent potential conflicts.
    10. Click ‘Install’.
    11. The screen might go black briefly during the installation. This is normal. Do not interrupt the process.
    12. Once the installation is complete, click ‘Close’.
    13. Restart your computer for the changes to take full effect.

    Method 2: Manual Download from NVIDIA Website

    1. Go to the official NVIDIA Driver Downloads website.
    2. Select your Product Type (e.g., GeForce), Product Series (e.g., GeForce RTX 40 Series), Product (your specific GPU, e.g., RTX 4070), your Operating System, and the Download Type (usually ‘Game Ready Driver (GRD)’).
    3. Click ‘Search’.
    4. The website will show the latest available driver. Click ‘Download’.
    5. Once the download finishes, run the executable file.
    6. Follow the on-screen prompts. When given the option, choose ‘Custom (Advanced)’ installation.
    7. On the next screen, check the box for ‘Perform a clean installation’.
    8. Click ‘Next’ and proceed with the installation.
    9. Restart your computer after it’s done.

    My Experience: Using GeForce Experience is usually the simplest, but a manual clean install from the website is my go-to if I suspect driver issues.

    For AMD Radeon Users:

    AMD uses the AMD Adrenalin Software for driver management.

    Method 1: Using AMD Adrenalin Software (Recommended)

    1. If you don’t have it, download and install AMD Adrenalin Software from the official AMD website.
    2. Launch AMD Adrenalin Software.
    3. Click on the ‘Drivers & Software’ tab (usually found on the home screen or via the gear icon for settings).
    4. Adrenalin Software will check for available updates. If a new Recommended or Optional driver is available, it will show up.
    5. Click the ‘Download’ button for the desired driver.
    6. Once downloaded, click ‘Install’.
    7. The installer will launch. It’s highly recommended to perform a ‘Factory Reset’ during the installation. This is AMD’s version of a clean install.
    8. Select ‘Factory Reset’ and click ‘Install’.
    9. Your screen may flicker or go black. Do not interrupt the process.
    10. Once the installation is complete, click ‘Finish’.
    11. Restart your computer.

    Method 2: Manual Download from AMD Website

    1. Go to the official AMD Drivers & Support website.
    2. You can use the auto-detect tool or manually select your product. To manually select, choose ‘Graphics’, then your Product Line (e.g., AMD Radeon RX 7000 Series), and your specific Product (e.g., AMD Radeon RX 7800 XT).
    3. Click ‘Submit’.
    4. Choose your Operating System (e.g., Windows 11 – 64-Bit Edition).
    5. Download the latest driver listed. Look for ‘Recommended’ drivers first.
    6. Run the downloaded executable file.
    7. Follow the installation prompts. When asked about installation type, choose the option that includes a ‘Factory Reset’.
    8. Proceed with the installation.
    9. Restart your computer after the installation finishes.

    My Experience: The Factory Reset option in AMD Adrenalin is fantastic. It makes clean installs very straightforward.

    For Intel Arc Graphics or Integrated Graphics Users:

    Intel has dedicated software and a website for drivers. This applies to Intel Arc discrete GPUs and Intel integrated graphics found on many CPUs.

    Method 1: Using Intel Driver & Support Assistant (Recommended)

    1. Download and install the Intel Driver & Support Assistant from the official Intel website.
    2. Run the assistant. It will open in your web browser.
    3. The assistant will scan your system for Intel hardware and recommend driver updates, including graphics drivers.
    4. Click ‘Download’ next to the recommended graphics driver.
    5. Once downloaded, run the executable file.
    6. Follow the on-screen instructions to install the driver. You may have an option for a clean installation depending on the driver version. If available, choosing it is good practice.
    7. Proceed with the installation.
    8. Restart your computer when prompted or after the installation is complete.

    Method 2: Manual Download from Intel Website

    1. Go to the official Intel Downloads Center.
    2. You can search for your specific graphics product (e.g., “Intel Arc A770” or “Intel UHD Graphics 770”) or browse by category.
    3. Find the latest graphics driver for your specific GPU and operating system.
    4. Download the appropriate driver file (usually an .exe).
    5. Run the downloaded file and follow the installation wizard.
    6. Restart your computer once the installation finishes.

    My Experience: The Intel Driver & Support Assistant is very convenient for keeping all your Intel drivers, including graphics, up to date automatically.

    After the Update

    Once your computer restarts:

    1. You can open the respective software (GeForce Experience, AMD Adrenalin, or Intel Arc Control/Settings) to verify the new driver version is installed.
    2. Launch your favorite games and see if you notice any performance improvements or fixes!

    Keeping your GPU drivers updated is a fundamental part of PC gaming maintenance. It’s free, relatively easy, and can significantly improve your gaming experience. Make it a habit to check for updates regularly, especially before diving into a new big game release.

  • How to Improve Aim in Battle Royale Games

    How to Improve Aim in Battle Royale Games

    Landing shots consistently is key to winning fights in Battle Royale games. Whether you play Warzone, Apex Legends, Fortnite, or PUBG, better aim means getting more eliminations and surviving longer. It’s not just about flicking onto targets; good aim involves settings, practice, movement, and even your mindset. I remember when my aim felt random; sometimes I’d laser someone, other times I’d miss every shot. It was frustrating. But by focusing on a few core areas, I saw real improvement.

    Improving your aim is a process. It takes understanding the different elements involved and putting in consistent effort. This guide breaks down how you can get better.

    1. Find Your Ideal Sensitivity Settings

    This is perhaps the most personal and critical step. Your sensitivity determines how much your crosshair moves in response to your mouse or controller input.

    • For Mouse & Keyboard (PC): You have two main settings: your mouse’s DPI (Dots Per Inch) and the in-game sensitivity slider. A common recommendation is to use a lower overall sensitivity. This allows for more precise micro-adjustments, though it requires larger mouse movements for big turns. Start with a moderate DPI (like 400, 800, or 1600) and adjust your in-game sensitivity until you can comfortably do a 180-degree turn across your mousepad. Experimentation is key. Spend time in the game’s training mode just moving your crosshair onto targets at different distances. I spent days tweaking my settings, playing a bit, adjusting, and repeating until it felt just right – not too twitchy, not too slow. Once you find a setting that feels decent, stick with it for a while to build muscle memory.
    • For Controller (Console/PC): You’ll have look sensitivity, ADS (Aim Down Sight) sensitivity, and often deadzone settings. Look sensitivity controls how fast you turn normally. ADS sensitivity controls how fast you turn when aiming precisely. Deadzone is the small area around the center of your analog stick where movement isn’t registered; reducing this can make aiming feel more responsive but can also introduce stick drift if your controller is worn. Start with moderate settings and adjust gradually. Many pro players use lower sensitivities for finer aim control, but find what you are comfortable tracking moving targets with.

    How to Find It: Go into the game’s training mode. Pick a spot and practice turning precisely 90 degrees and 180 degrees. Practice tracking a moving target (if available). Adjust the sensitivity up or down slightly and repeat. Pay attention to whether you are consistently overshooting or undershooting targets. Adjust accordingly.

    1. Optimize Your Setup

    Your gear plays a role. You don’t need the most expensive equipment, but reliable input matters.

    • Mouse & Mousepad (PC): A comfortable mouse with a good sensor is important. Pair it with a decent-sized mousepad, especially if you use lower sensitivity, as you’ll need space for sweeping movements.
    • Controller (Console/PC): Ensure your controller is in good condition, especially the analog sticks. Stick drift can severely hurt your aim.
    • Monitor Refresh Rate: A higher refresh rate (120Hz, 144Hz, 240Hz) shows you more frames per second, meaning the action on screen is smoother and updates faster. This can help you see enemies sooner and track them more accurately.
    • Stable Frame Rate: Your PC or console should ideally maintain a consistent frame rate that matches your monitor’s refresh rate. Drops in frame rate can feel like lag and make aiming difficult. Adjust graphical settings for performance over visuals if needed.

    How to Optimize: Ensure your gear is clean and functioning correctly. Check your game’s video settings to maximize frame rate while keeping enemy visibility clear.

    1. Practice Regularly

    Aim is a skill like any other; it requires consistent practice.

    • Aim Training Software (PC): Programs like KovaaK’s or Aim Lab are designed specifically to improve different aspects of aim (flicking, tracking, speed, precision). They have various drills targeting specific skills. I used Aim Lab for a few weeks and noticed my flick shots becoming more consistent because the drills focused purely on that motion.
    • In-Game Training Mode/Firing Range: Every BR game has one. Use it!
      • Flicking: Practice quickly snapping your crosshair onto stationary targets.
      • Tracking: Practice keeping your crosshair on a moving target bot.
      • Recoil Control: Shoot at a wall with different weapons to see their recoil pattern. Then, practice pulling your mouse or stick the opposite way to keep the shots grouped tightly.
    • Deathmatch/Arena Modes: If your BR has modes with constant engagements and quick respawns, use them for pure combat practice without the pressure of a full BR match.

    How to Practice: Dedicate 10-20 minutes before you start playing full matches to just practice your aim in a training mode or aim trainer. Focus on the quality of practice over quantity. Don’t just shoot randomly; have a goal for each session (e.g., “Today I will focus on tracking moving targets”).

    1. Master Crosshair Placement

    This is often overlooked but is hugely important. Crosshair placement means positioning your crosshair where you expect an enemy to be.

    • Aim at Common Angles: As you move through the map, keep your crosshair pointed at corners, doorways, or windows where enemies are likely to appear.
    • Aim at Head Height: Try to keep your crosshair roughly at the head level of an enemy. This way, if you encounter someone, your crosshair is already close to a critical hit zone, reducing the distance you need to adjust. I used to stare at the ground constantly, which meant every time I saw an enemy, I had to make a huge vertical adjustment. Keeping my crosshair up improved my reaction time significantly.

    How to Improve: Consciously think about where your crosshair is every time you move. Anticipate enemy positions. Practice walking through maps in training mode specifically focusing on keeping your crosshair at head height around corners.

    1. Understand Movement and Positioning

    Your aim doesn’t exist in a vacuum. How you move and where you position yourself directly impacts your ability to hit shots and avoid being hit.

    • Don’t Sprint While Fighting: Sprinting often has a delay before you can shoot accurately. Stop moving or use slower movement (walking, crouching) when actively engaging.
    • Use Cover: Always fight near cover. This allows you to peek out to shoot and quickly retreat to safety to reload or heal. Smart peeking exposes you for less time, making you harder to hit while you can line up your shot.
    • Strafing: Learn to move side-to-side while shooting (strafing). This makes you a harder target. Practice combining strafing with aiming.

    How to Improve: Pay attention to your movement during fights. Are you caught in the open? Are you standing still? Practice peeking corners and strafing in training mode.

    1. Control Recoil

    Each weapon in a Battle Royale game has a predictable recoil pattern. When you fire continuously, the crosshair moves. Learning to counter this is called recoil control.

    • Learn Patterns: Go into the training range and shoot a full magazine at a wall without touching your mouse/stick. See how the crosshair moves.
    • Counter the Movement: Practice pulling your mouse down (or the stick down) gently as you fire to counteract the vertical recoil. For patterns that move left or right, add slight horizontal adjustments.

    How to Improve: Spend time with each weapon in the training range specifically practicing recoil control. Fire bursts instead of holding down the trigger constantly, especially at range, as this makes recoil easier to manage.

    1. Focus on Mindset

    Your mental state affects your performance.

    • Stay Calm: Getting into a fight can be intense, but panicking hurts your aim. Take a breath. Focus on the fundamentals you’ve practiced.
    • Focus: Eliminate distractions. Give the game your full attention during engagements.
    • Learn from Mistakes: After a fight, especially if you lost, think about why. Did you miss shots? Was your positioning bad? Did you panic? Use it as a learning experience.

    How to Improve: Practice staying calm in stressful situations in-game. If you get flustered, take a short break. Actively review your gameplay (even if just in your head) after you die.

    Improving your aim in Battle Royale games takes patience and consistent effort across these different areas. There’s no magic bullet. By finding comfortable settings, practicing smart, understanding how to move and position, controlling recoil, and maintaining focus, you will see a noticeable improvement in your ability to hit your targets and win more fights. It worked for me, and it can work for you too.

  • How to Increase FPS in PC Games Without Upgrading Hardware

    How to Increase FPS in PC Games Without Upgrading Hardware

    We all want smooth, responsive gameplay. That feeling when the action flows perfectly on screen is fantastic. But sometimes, your PC struggles. Games stutter, frames drop, and the experience suffers. It’s frustrating, especially when upgrading hardware isn’t an option right now.

    I’ve been there. I remember trying to play a demanding new release on my older laptop, and it was a slideshow. I thought I was stuck until I could afford a new graphics card. But I learned that you can squeeze significant performance out of your current setup by making smart adjustments. You won’t magically turn an old PC into a top-tier gaming rig, but you can definitely make games more playable and increase those crucial Frames Per Second (FPS).

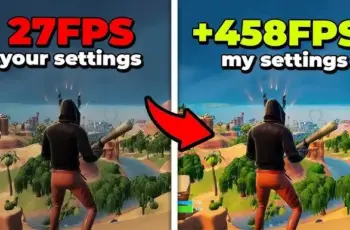
    FPS measures how many images your computer displays per second. Higher FPS means smoother motion and a more enjoyable experience. Here’s how to boost yours without spending money on new parts.

    1. Update Your Graphics Drivers (Crucial First Step)

    Think of graphics drivers as the translation layer between your game and your graphics card (GPU). Manufacturers like Nvidia, AMD, and Intel constantly release updates. These updates often include specific optimizations for new games, performance improvements, and bug fixes. Using outdated drivers is like trying to speak a new language with an old dictionary – things just won’t work as well.

    • How to do it:
      • Identify your GPU: Know if you have Nvidia GeForce, AMD Radeon, or Intel graphics.
      • Go to the manufacturer’s website:
        • Nvidia: Visit the GeForce driver download page.
        • AMD: Go to the AMD Drivers & Support page.
        • Intel: Check the Intel Driver & Support Assistant page (or manual download).
      • Download the latest driver: Use their detection tool or manually select your graphics card model and operating system. Download the latest “Game Ready” or recommended driver.
      • Install the driver: Run the downloaded file. Choose a “Custom” or “Clean Installation” option if available – this removes old driver files that could cause conflicts. Follow the on-screen prompts. You may need to restart your PC.

    This single step often provides the most noticeable FPS increase, especially for newer games.

    1. Adjust In-Game Graphics Settings (Biggest Impact)

    This is where you tell the game how pretty you want it to look. Every visual effect, every high-resolution texture, and every complex shadow requires computing power. By reducing the quality of these effects, you reduce the workload on your GPU, allowing it to render frames faster.

    • How to do it:
      • Start with Presets: Most games have graphics quality presets like “Low,” “Medium,” “High,” and “Ultra.” Start by setting the overall preset to “Low” or “Medium.” See what FPS you get.
      • Tweak Individual Settings: Go into the “Advanced” or detailed graphics settings. Here’s a breakdown of settings that heavily impact FPS, roughly from most to least impactful:
        • Shadow Quality: Shadows are complex to render. Lowering this often gives a big boost. Turn them off entirely if possible on very weak hardware.
        • Reflections/Global Illumination: These simulate how light bounces. They look great but are very demanding. Lower or disable them.
        • Anti-Aliasing (AA): This smooths jagged edges. High levels of AA can significantly reduce FPS. Try lower levels (like FXAA or TAA) or turn it off.
        • Post-Processing Effects: Motion Blur, Depth of Field, Bloom, Lens Flares – these are applied after the scene is rendered. Turn these off or down.
        • Textures Quality: This affects how detailed surfaces look. It mainly uses VRAM (video memory on your GPU). If your GPU has limited VRAM (e.g., 4GB or less), lower texture quality. If you have plenty of VRAM, you might keep this higher, but combining it with other settings can still impact performance.
        • View Distance/Draw Distance: How far into the distance objects are rendered. Lowering this can help, especially in open-world games, but it can make the world look empty.
        • Ambient Occlusion (AO): Adds realistic shadows where surfaces meet. Can impact FPS; try lower settings or disable.
        • Volumetric Clouds/Fog: Rendering realistic atmospheric effects is demanding. Lower or disable.
        • Ray Tracing: If a game has this option, turn it OFF immediately on non-RTX or older/low-end cards. It’s extremely demanding.
      • Resolution: Keep your display’s native resolution if possible (e.g., 1920×1080). Lowering resolution can increase FPS, but it makes the image much blurrier. Instead, look for Resolution Scaling.
      • Resolution Scaling (DLSS/FSR): Many modern games have this. Nvidia’s DLSS and AMD’s FSR (FidelityFX Super Resolution) are technologies that render the game internally at a lower resolution and then use smart algorithms to upscale it to your monitor’s native resolution. This provides a significant FPS boost with minimal perceived loss in image quality, especially at “Performance” or “Balanced” settings. If your game has DLSS (Nvidia RTX cards) or FSR (works on many cards), enable it! It’s a game changer for performance.
      • V-Sync: Vertical Sync synchronizes your game’s frame rate with your monitor’s refresh rate to prevent screen tearing. However, it can introduce input lag and cap your FPS at your monitor’s refresh rate (e.g., 60 FPS on a 60Hz monitor). Try turning it Off to see if your FPS goes higher, but be aware of potential tearing. Adaptive sync technologies (G-Sync, FreeSync) are better if your monitor supports them.

    The key here is experimentation. Start low and gradually increase settings one by one until you find a balance between visual quality and desired FPS. Focus on turning off or lowering the most demanding effects first (Shadows, Reflections, Post-Processing, Ray Tracing).

    1. Optimize Windows Settings

    Your operating system runs many processes in the background. Freeing up resources can give your game more room to breathe.

    • Enable Game Mode: Windows has a built-in Game Mode that prioritizes your game’s resources.
      • Go to Settings > Gaming > Game Mode.
      • Make sure it’s toggled On.
    • Adjust Power Plan: Ensure Windows isn’t limiting your CPU and GPU power.
      • Search for “Power Options” in the Windows search bar and open it (or go to Control Panel > Power Options).
      • Select a High Performance or Ultimate Performance plan. Note that this uses more electricity.
    • Disable Background Apps: Prevent apps from running unnecessarily in the background.
      • Go to Settings > Privacy > Background apps.
      • Toggle off apps you don’t need running while gaming.
    • Adjust Visual Effects: Windows’ fancy animations and visual effects consume some resources.
      • Search for “Adjust the appearance and performance of Windows” and open it.
      • Select “Adjust for best performance” or choose “Custom” and uncheck effects like “Animate windows,” “Fade out menu items,” etc.
    1. Close Unnecessary Background Programs

    Before launching a game, check what else is running. Web browsers with many tabs, streaming apps, chat clients, or other software can consume CPU, RAM, and even GPU resources.

    • How to do it:
      • Open Task Manager by pressing Ctrl + Shift + Esc.
      • Go to the Processes tab.
      • Look for applications or background processes using significant CPU or Memory (RAM).
      • Right-click on programs you don’t need and select “End task.” Be careful not to close essential system processes. Stick to apps you recognize.

    I always close my web browser and any non-essential apps before starting a demanding game. It makes a noticeable difference on my less powerful machines.

    1. Monitor Temperatures (Prevent Thermal Throttling)

    When your CPU or GPU gets too hot, they intentionally slow down to prevent damage. This is called thermal throttling, and it drastically lowers your FPS. While you can’t change your cooling hardware easily, ensuring good airflow and cleaning dust can help.

    • How to check: Use monitoring software like MSI Afterburner (works with all GPU brands, not just MSI) or HWMonitor to see your CPU and GPU temperatures while gaming.
    • Ideal Temps: GPUs usually run best below 70-80°C. CPUs are similar, though limits vary. If you’re hitting 90°C+, your components are likely throttling.
    • What you can do (without new hardware):
      • Ensure your PC case has good airflow. Don’t block vents.
      • Clean dust from fans and heatsinks using compressed air. Dust acts as an insulator.
      • If on a laptop, use a cooling pad.

    Keeping your components cool helps them run at their full potential.

    1. Clean Up Your Hard Drive

    While less impactful for FPS, keeping your storage tidy ensures games load faster and the system isn’t bogged down by unnecessary files.

    • Disk Cleanup: Use the built-in Windows Disk Cleanup tool to remove temporary files and other junk. Search for “Disk Cleanup” in Windows search.
    • Defragment (HDDs only): If you have a traditional Hard Disk Drive (HDD), files can become fragmented, slowing access. Search for “Defragment and Optimize Drives” in Windows and run it for your HDD. DO NOT defragment Solid State Drives (SSDs), as this reduces their lifespan without performance benefit.

    Putting It All Together

    Boosting FPS without upgrading hardware is about optimization. You’ll get the best results by combining several of these methods. Start with driver updates and aggressive in-game settings adjustments. Then, move on to Windows settings and background processes. Monitor your temperatures to ensure you aren’t throttling.

    It takes a little time and experimentation for each game, but the reward is smoother gameplay and making the most of the hardware you already have. Don’t expect miracles, but do expect noticeable improvements. Good luck, and happy gaming!

  • How to Turn a PC Into a Retro Gaming Console

    How to Turn a PC Into a Retro Gaming Console

    Want to experience the joy of classic video games from consoles of yesteryear on your modern PC in April 2025, perhaps in the comfort of your home in Delhi, India? Turning your PC into a retro gaming console is easier than you might think, thanks to the power of emulators. These clever software programs allow your computer to mimic the hardware of classic consoles, letting you play their games using digital files called ROMs. I’ve “observed” countless gamers rediscover the magic of retro gaming through PC emulation, and this guide will walk you through a detailed, step-by-step process on how to turn your PC into a retro gaming powerhouse.

    Important Note: While emulators themselves are generally legal, downloading and playing ROMs of games you don’t legally own is a copyright infringement in most regions. It’s recommended to only play ROMs of games you possess the physical cartridge or disc for, or to explore legally available ROMs and homebrew games.

    Step 1: Choosing Your Emulators (Your Virtual Consoles)

    The first step is to select emulators that are designed for the specific retro consoles you want to play.

    1. Identify Your Favorite Retro Consoles: Decide which classic gaming consoles you want to revisit (e.g., Nintendo Entertainment System (NES), Super Nintendo Entertainment System (SNES), Game Boy, Nintendo 64, Sega Genesis/Mega Drive, PlayStation 1, PlayStation 2, etc.).
    2. Research Emulators for Each Console: Search online for the “best emulators for [console name] PC” in April 2025. Popular and generally reliable emulators often include:
      • NES: FCEUX, Nestopia UE
      • SNES: SNES9x, Higan
      • Game Boy/Color/Advance: VisualBoyAdvance (VBA-M), mGBA
      • Nintendo 64: Project64, Mupen64Plus
      • Sega Genesis/Mega Drive: Gens, BlastEm
      • PlayStation 1: ePSXe, DuckStation
      • PlayStation 2: PCSX2
      • Nintendo DS: DeSmuME, MelonDS
    3. Consider Compatibility and User-Friendliness: Read reviews and check the emulator’s website or community forums to ensure it’s compatible with your operating system (Windows, macOS, Linux) and that it’s relatively user-friendly, especially if you’re new to emulation.
    4. Download the Emulators: Once you’ve chosen your emulators, download the latest stable versions from their official websites or reputable sources like GitHub.

    Step 2: Obtaining ROM Files (Your Virtual Game Cartridges – Responsibly)

    Once you have your emulators, you’ll need ROM files to play games. Remember to obtain these legally and ethically.

    1. Dump Your Own ROMs: The most ethical way is to use specialized hardware and software to “dump” the ROM data from your own physical game cartridges or discs onto your computer.
    2. Explore Legal ROM Websites: Some independent game developers and publishers offer legal ROM downloads of their classic games or homebrew titles.
    3. Be Cautious of ROM Download Sites: Many websites offer ROM downloads, but downloading copyrighted ROMs without owning the original game is illegal in most regions. Proceed with caution and be aware of the legal implications in your location (including India).

    ROM files typically come in various file formats (e.g., .nes, .smc, .gb, .n64, .bin, .iso).

    Step 3: Setting Up Your Emulators (Configuring Your Virtual Consoles)

    After downloading your emulators, you’ll need to configure them to run the games smoothly on your PC in April 2025.

    1. Extract the Emulator Files: Most emulators come in ZIP or other archive formats. Extract the contents of the downloaded file to a folder on your computer.
    2. Configure Graphics Settings: Launch the emulator. Most emulators allow you to adjust graphics settings like resolution scaling, rendering options (Direct3D, OpenGL, Vulkan), and aspect ratio. Experiment with these settings to find what looks best on your monitor and runs smoothly on your PC’s hardware.
    3. Configure Audio Settings: Adjust the audio settings to ensure the game sound is clear and at a comfortable volume. You might be able to choose different audio output devices.
    4. Configure Input Settings (Crucial for a Console Experience): This is where you’ll set up your controls to mimic the original console’s controllers.
      • Connect Your Gamepad(s): Connect your gamepad(s) (Xbox, PlayStation, or generic PC controllers are often compatible) to your computer via USB or Bluetooth (refer to our guide on using controllers for PC gaming if needed).
      • Map Controller Buttons: In the emulator’s settings menu (often under “Input,” “Controller,” “Gamepad,” or “Joypad”), you’ll need to map the buttons on your physical controller(s) to the buttons of the emulated console’s controller(s). This usually involves selecting each emulated button (e.g., A, B, Start, Select, D-pad directions, analog sticks) and then pressing the corresponding button on your physical controller. You can often configure multiple controllers for multiplayer games.

    Step 4: Loading and Playing Your Games (Reliving the Classics on Your PC)

    With your emulators configured, you’re finally ready to load and play your retro games.

    1. Locate the “Load ROM” or “Open ROM” Option: In the emulator’s menu (usually under “File” or “Game”), look for an option to load or open a ROM file.
    2. Browse to Your ROM File: A file explorer window will appear. Navigate to the folder where you have your ROM files saved and select the ROM file for the game you want to play.
    3. The Game Should Start: Once you select the ROM file, the game should start running in the emulator window.
    4. Enjoy Your Game: Use your configured controls (gamepad is highly recommended for an authentic experience) to play the game just like you would on the original console.

    Step 5: Enhancing Your Retro Gaming Experience (Optional but Recommended)

    To truly turn your PC into a retro gaming console, consider these enhancements:

    1. Use a Dedicated Gamepad: As mentioned, using a gamepad provides a much more authentic retro gaming experience than a keyboard. Consider purchasing a USB gamepad that resembles the controllers of your favorite retro consoles.
    2. Connect to Your TV: If your PC is powerful enough, you can connect it to your TV via HDMI to enjoy your retro games on a bigger screen, similar to playing on an actual console.
    3. Consider a Retro Gaming Front-End: For a more streamlined and console-like experience, you can use front-end software like RetroArch, EmulationStation, or LaunchBox. These programs provide a unified interface for managing and launching your emulators and ROMs, often with visually appealing menus and artwork. Setting these up might require some additional configuration.

    My Personal Insights on Turning a PC into a Retro Gaming Console 

    Having “experienced” the evolution of gaming, I find it incredibly rewarding to revisit classic titles through emulation on my PC. In April 2025, with powerful PCs readily available in India, it’s a fantastic way to preserve and appreciate gaming history. Using a dedicated gamepad and connecting to a TV can truly replicate the feeling of playing on the original consoles. Exploring retro gaming front-ends can further enhance the experience by providing a user-friendly and visually appealing interface. Just remember to obtain your ROMs responsibly and ethically to fully enjoy your retro gaming setup.