Blog

  • How to Transfer Data from Old Phone to New Samsung

    How to Transfer Data from Old Phone to New Samsung

    Getting a new Samsung Galaxy phone is exciting, but the thought of moving all your precious photos, contacts, messages, and apps can feel like a daunting task. Thankfully, Samsung offers robust solutions to make this process seamless, no matter if you’re coming from another Android device, an iPhone, or even an older Samsung. This guide will walk you through the most effective methods to transfer data from your old phone to your new Samsung.

    Why Transfer Your Data?

    Transferring your data ensures a smooth transition to your new device. You get to:

    • Keep all your contacts, messages, and call logs.
    • Retain your cherished photos and videos.
    • Migrate your apps and their data.
    • Move over important documents and files.
    • Recreate your personalized settings and home screen layout.

    Essential Preparations Before Transferring

    Before you begin the transfer process, a little preparation goes a long way to ensure everything runs smoothly.

    1. Charge Both Phones: Ensure both your old phone and your new Samsung are charged to at least 50% battery, or preferably more. A dying battery mid-transfer can interrupt the process.
    2. Stable Connection: For wireless transfers, ensure both phones are connected to a stable Wi-Fi network. For wired transfers, have the appropriate cables ready.
    3. Check Storage Space: Verify that your new Samsung phone has enough available storage to accommodate all the data from your old device.
    4. Update Smart Switch (if applicable): If you plan to use Samsung Smart Switch, ensure the app is updated to the latest version on both devices.
    5. Disable Features (Old Phone): Turn off features like Wi-Fi Hotspot or Power Saving Mode on your old phone, as they can interfere with the transfer.

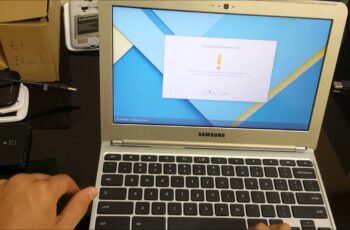
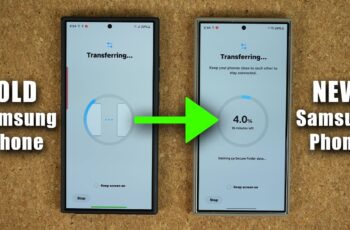
    Method 1: Samsung Smart Switch (Recommended for All Devices)

    Samsung Smart Switch is the most comprehensive and recommended tool for transferring data to your new Samsung Galaxy. It supports transfers from Android, iOS, and even other Samsung devices. You can transfer wirelessly or via a wired connection.

    Option A: Wireless Transfer (Wi-Fi)

    This is the most convenient method as it requires no cables (beyond charging).

    What You’ll Need:

    • Both your old phone and new Samsung Galaxy.
    • Both phones connected to the same Wi-Fi network.

    Steps:

    1. On your new Samsung Galaxy: During the initial setup, you’ll be prompted to “Bring your old data.” Select Smart Switch. If you’ve already set up your phone, open the Smart Switch app (it’s usually pre-installed in the Samsung folder, or you can download it from the Galaxy Store).
    2. Select Receive data.
    3. Choose your old phone type: Galaxy/Android or iPhone/iPad.
    4. Select Wireless.
    5. On your old phone: Download and open the Smart Switch app from the Google Play Store (for Android) or the App Store (for iPhone).
    6. Select Send data.
    7. Select Wireless.
    8. Connect the devices: The phones will attempt to connect. A numerical code may appear on one phone to be entered on the other, or they might connect automatically. Confirm the connection.
    9. Select data to transfer: On your old phone, choose the categories of data you wish to transfer (e.g., contacts, messages, apps, photos, videos, call history, settings, etc.). Smart Switch provides granular control.
    10. Tap Transfer.
    11. Wait for completion: The transfer time will vary based on the amount of data. Keep both phones close to each other and do not use them until the transfer is finished.
    12. Once complete, tap Done on both devices. Your new Samsung phone will now optimize the transferred data.

    Option B: Wired Transfer (USB Cable)

    A wired transfer is often faster and more stable, especially for large amounts of data.

    What You’ll Need:

    • Both your old phone and new Samsung Galaxy.
    • A USB-C to USB-C cable (for newer phones) or an OTG adapter (often included with new Samsung phones) if your old phone uses micro-USB or USB-A.

    Steps:

    1. On your new Samsung Galaxy: During the initial setup, select Smart Switch. If already set up, open the Smart Switch app.
    2. Select Receive data.
    3. Choose your old phone type: Galaxy/Android or iPhone/iPad.
    4. Select Cable.
    5. Connect the devices:
      • For Android to Samsung (USB-C to USB-C): Connect the USB-C cable directly between both phones.
      • For Android to Samsung (older phones/micro-USB): Connect your old phone’s USB cable to the OTG adapter, then plug the OTG adapter into your new Samsung.
      • For iPhone to Samsung: Connect your iPhone’s Lightning cable to the OTG adapter, then plug the OTG adapter into your new Samsung.
    6. On your old phone, if prompted, allow access to data.
    7. Select data to transfer: On your old phone, choose the data categories you want to move.
    8. Tap Transfer.
    9. Wait for completion: Keep the cable connected until the transfer is 100% complete.
    10. Tap Done on both devices.

    Method 2: Google Backup & Restore (For Android to Android)

    If you’re moving from another Android device to a new Samsung, your Google Account backup is an excellent way to restore essential data, especially if Smart Switch isn’t an option or you prefer a cloud-based approach.

    What Data is Backed Up:

    • App data
    • Call history
    • Contacts
    • Device settings (Wi-Fi passwords, display settings)
    • Google Calendar
    • Photos and videos (via Google Photos backup)
    • SMS text messages

    Steps:

    1. On your old Android phone (ensure backup is active):
      • Go to Settings > Google > Backup (or System > Backup).
      • Ensure “Back up to Google Drive” is turned on and that a recent backup exists. You might need to tap “Back up now” to perform a fresh backup.
    2. On your new Samsung Galaxy (during initial setup):
      • During the setup process, when prompted to connect to Wi-Fi, do so.
      • You’ll then be asked to sign in with your Google Account. Use the same Google Account you used on your old phone.
      • After signing in, you’ll see an option to “Restore from your Android phone backup” or “Copy data.” Select this option.
      • Choose the most recent backup from your old device.
      • Select the data you wish to restore (apps, call history, device settings, etc.).
      • Tap Restore or Next.
    3. Complete setup: Continue with the rest of the setup process. Your apps will begin downloading in the background. Photos and videos will sync from Google Photos if enabled.

    Note: Google Backup primarily restores apps and system settings. For a more comprehensive transfer of local files, messages, and specific app data (like WhatsApp chat history), Smart Switch is usually better.

    Method 3: Cloud Services for Photos & Videos (Google Photos, OneDrive, etc.)

    For media files, cloud services are a robust and reliable way to ensure your photos and videos are safe and accessible on any device.

    Steps:

    1. On your old phone:
      • Ensure all your photos and videos are backed up to your preferred cloud service (e.g., Google Photos, OneDrive, Dropbox).
      • For Google Photos, open the app, go to your profile icon, and ensure “Backup is on” or “Backup complete.”
    2. On your new Samsung Galaxy:
      • Sign in to the same cloud account (e.g., your Google Account for Google Photos).
      • Open the respective app (e.g., Google Photos). Your media should automatically sync and appear. You can then download specific items to your device if needed.

    Method 4: Manual Transfer (for Specific Files)

    Sometimes you just need to move a few specific files, or you prefer a hands-on approach.

    Option A: USB Cable to PC (Old Android to Samsung)

    1. Connect your old Android phone to your PC using a USB cable.
    2. On your phone, select “File transfer” or “MTP” mode when prompted.
    3. On your PC, open “This PC” or “My Computer” and navigate to your old phone’s internal storage or SD card.
    4. Copy the desired files (e.g., from DCIM for photos, Download folder for documents) to a folder on your PC.
    5. Disconnect your old phone and connect your new Samsung Galaxy to the PC.
    6. On your new Samsung, select “File transfer” mode.
    7. Copy the files from your PC to the appropriate folders on your new Samsung phone.

    Option B: SD Card (If both phones have an SD card slot)

    1. On your old phone: Move desired files (photos, videos, documents) from internal storage to the SD card.
    2. Safely eject the SD card from your old phone.
    3. Insert the SD card into your new Samsung phone.
    4. Access the files via the My Files app on your new Samsung. You can then move them to internal storage if preferred.

    What About WhatsApp Chat History?

    WhatsApp chat history requires a specific transfer method, as it’s not typically included in general phone backups or Smart Switch transfers between different operating systems (e.g., iPhone to Android).

    • Android to Samsung (Android to Android):
      1. On your old phone, open WhatsApp.
      2. Go to Settings > Chats > Chat backup.
      3. Select “Back up to Google Drive” and ensure your Google account is selected. Tap “Back Up” to create a fresh backup.
      4. On your new Samsung, install WhatsApp, open it, and verify your phone number.
      5. When prompted, select “Restore” from your Google Drive backup.
    • iPhone to Samsung:
      1. This used to be very challenging, but Samsung and WhatsApp have introduced an official way using Smart Switch.
      2. During the Smart Switch wired transfer from iPhone to Samsung, when selecting data categories, ensure “Apps” or specifically “WhatsApp” is selected.
      3. Follow the prompts. You might need to scan a QR code on your iPhone and perform some steps within WhatsApp on both devices. This leverages the “Move chats to Android” feature within WhatsApp.

    Post-Transfer Steps

    Once your data is successfully transferred, consider these steps:

    • Check Data Integrity: Browse through your photos, contacts, and messages on your new Samsung to ensure everything transferred correctly.
    • Sign into Accounts: Re-sign into all your necessary apps and accounts (banking, social media, streaming services, etc.).
    • Organize Your Home Screen: Re-arrange your app icons and widgets to your preference.
    • Delete Data (Old Phone): Once you’re confident all data is on your new phone, perform a factory reset on your old phone to wipe all personal data before selling, recycling, or passing it on. Go to Settings > General management > Reset > Factory data reset.

    Transferring data to your new Samsung phone is easier than ever with tools like Smart Switch. By following these steps, you can enjoy your new device with all your precious memories and information intact.

  • How to optimize Samsung phone for gaming

    How to optimize Samsung phone for gaming

    Samsung phones, especially their flagship models, are powerful devices capable of handling demanding games. However, simply installing a game isn’t always enough to get the best experience. To unlock peak performance and ensure smooth, immersive gameplay, you need to optimize your Samsung phone for gaming. This guide will walk you through the essential steps to enhance your gaming sessions, from tweaking settings to managing your phone’s resources.

    Understanding Gaming Performance Factors

    Before diving into optimization, it’s good to know what affects your gaming experience:

    • Processor (CPU/GPU): The brain and graphics engine of your phone.
    • RAM: Short-term memory for running apps and games.
    • Display: Refresh rate, resolution, and touch responsiveness.
    • Battery: Sustained performance can drain it quickly.
    • Storage: Fast storage helps load games quicker.
    • Network: Stable internet for online multiplayer games.
    • Heat: Excessive heat can lead to performance throttling.

    Now, let’s get your Samsung phone ready for prime gaming.

    1. Leverage Samsung’s Game Booster and Game Launcher

    Samsung provides built-in tools designed specifically for gaming. These are your first line of defense for gaming optimization.

    • Access Game Launcher:
      • Find the Game Launcher app on your home screen or in your app drawer. This centralizes all your games and provides quick access to gaming tools.
      • If you can’t find it, go to Settings > Advanced features > Game Launcher and toggle it on.
    • Configure Game Booster Settings:
      • Within Game Launcher, tap the “More” (three horizontal lines) icon in the bottom right, then select “Game Booster”.
      • Game Performance: Tap on this to adjust performance.
        • Performance: Select “Focus on performance” for maximum frames per second (FPS). This will consume more battery and might generate more heat.
        • Standard: A balanced option.
        • Battery saving: Reduces performance to extend play time.
      • Blocking during game: Customize what gets blocked during gameplay.
        • Toggle on “Block during game” for calls, notifications, Bixby, edge panels, and navigation gestures. This prevents interruptions.
      • Screen Touch Lock: This feature prevents accidental touches during gameplay. It’s great for games where your hand might brush the screen.
      • Screen Resolution (in-game): Some games allow you to adjust the resolution within Game Booster for better performance or visuals. A lower resolution generally means higher FPS.
      • Maximum FPS (in-game): If your phone has a high refresh rate display (e.g., 120Hz), ensure this is set to match the display’s capabilities for the smoothest experience.
    1. Optimize Display Settings for Gaming

    Your screen plays a crucial role in how games look and feel.

    • Set Highest Refresh Rate:
      • For phones with 120Hz or higher refresh rate displays, make sure it’s active.
      • Go to Settings > Display > Motion smoothness. Select “Adaptive” (recommended for general use) or “High” (for consistently high refresh rates, which might drain more battery).
    • Adjust Screen Resolution:
      • While high resolution looks sharp, it demands more from your GPU.
      • Go to Settings > Display > Screen resolution. If you’re experiencing lag, try lowering it from WQHD+ to FHD+ or even HD+ for certain demanding games. You can usually change this globally or per-game within Game Booster.
    • Disable Eye Comfort Shield / Blue Light Filter:
      • This feature changes screen colors to reduce eye strain, but it can affect game visuals. Turn it off during gaming sessions.
      • Go to Settings > Display > Eye comfort shield.
    • Enable Touch Sensitivity:
      • For precise controls, especially in shooters or rhythm games, increased touch sensitivity can help.
      • Go to Settings > Display > Touch sensitivity and toggle it on.
    1. Clear Background Processes and Free Up RAM

    Running too many apps in the background can hog resources and slow down your game.

    • Close Unused Apps:
      • Before launching a game, open your Recent Apps (usually by swiping up and holding, or tapping the recent apps button) and close all unnecessary applications.
    • Restart Your Phone:
      • A quick restart can clear out temporary files and background processes, giving your phone a fresh start and freeing up RAM for gaming. Do this before an important gaming session.
    • Utilize Device Care Optimization:
      • Go to Settings > Battery and device care.
      • Tap “Optimize now” to quickly clean up RAM, storage, and background app activity.
      • Explore the “Memory” section to see which apps are using RAM and manually stop them if needed.
      • Under “Storage,” clean up junk files to free up space.
    1. Ensure Stable Connectivity

    For online multiplayer games, a strong, stable internet connection is paramount.

    • Use Wi-Fi Over Mobile Data:
      • Whenever possible, connect to a stable Wi-Fi network. Wi-Fi generally offers lower latency and more consistent speeds than mobile data, especially in areas with poor cellular coverage.
    • Turn Off Mobile Data When Using Wi-Fi (Optional):
      • If your Wi-Fi is strong, you can temporarily turn off mobile data to prevent your phone from trying to switch between the two, which can cause lag spikes.
    • Disable Smart Network Switch:
      • This feature automatically switches between Wi-Fi and mobile data. While convenient, it can cause interruptions during online gaming.
      • Go to Settings > Connections > Wi-Fi > Intelligent Wi-Fi (or Advanced Wi-Fi settings) and disable “Switch to mobile data” or similar options.
    1. Manage Notifications and Interruptions

    Nothing breaks immersion like a pop-up notification during a crucial moment.

    • Use Game Booster’s Notification Blocking:
      • As mentioned in section 1, Game Booster allows you to block calls and notifications during gameplay. This is the most effective way.
    • Enable Do Not Disturb Mode:
      • For a system-wide approach, activate Do Not Disturb mode.
      • Go to Settings > Notifications > Do not disturb. You can schedule it or turn it on manually. Customize exceptions if needed (e.g., allow calls from starred contacts).
    1. Keep Your Phone Cool

    Overheating is the enemy of performance. When a phone gets too hot, it throttles its performance to prevent damage, leading to frame drops and lag.

    • Remove Phone Case:
      • If your phone is getting warm, remove its case during extended gaming sessions to allow for better heat dissipation.
    • Avoid Charging While Gaming:
      • Charging generates heat, and gaming generates heat. Doing both simultaneously can lead to rapid overheating. If possible, charge your phone fully before you start playing.
    • Play in a Cool Environment:
      • Avoid gaming in direct sunlight or hot rooms. A cooler ambient temperature helps your phone stay cool.
    • Reduce Graphics Settings in-Game:
      • If your phone consistently overheats with a particular game, try lowering the in-game graphics settings (e.g., texture quality, shadows, anti-aliasing).
    1. Advanced Tips (Use with Caution)

    These tips are for users who want to squeeze every last bit of performance, but they might slightly impact battery life or general phone usage.

    • Developer Options (if enabled):
      • If you’ve enabled Developer Options (by tapping build number seven times in About Phone), you can find some tweaks.
      • “Force 4x MSAA”: This can improve graphics quality in some OpenGL ES 2.0 games but significantly increases GPU load and battery drain. Use with caution.
      • “Don’t keep activities”: This destroys every activity as soon as you leave it. While it frees RAM, it can make multitasking cumbersome.
      • “Background process limit”: Setting this to “No background processes” will ensure only the active game runs. This is great for dedicated gaming but makes switching between apps slow.
    • Factory Reset (Last Resort):
      • If your phone feels consistently slow and nothing else helps, a factory reset can clear out years of accumulated junk and return your phone to its “like new” state. Backup your data first! This is a drastic step, but effective for chronic performance issues.

    By following these steps, you can significantly optimize your Samsung phone for gaming, ensuring a smoother, more enjoyable, and interruption-free experience with your favorite mobile titles. Happy gaming!

  • How to Update Samsung Default Apps Manually

    How to Update Samsung Default Apps Manually

    Keeping your Samsung default apps updated is crucial for security, performance, and accessing the latest features. While your phone often handles updates automatically, knowing how to manually update Samsung default apps gives you control and can help resolve issues or get new features faster. This guide will walk you through the process, covering the different sources for these updates.

    Why Manually Update Samsung Default Apps? Even if you have automatic updates enabled, there are good reasons to perform a manual check:

    • Access Latest Features Immediately: New features often roll out with app updates. Manually checking means you don’t have to wait for the automatic schedule.
    • Bug Fixes and Performance Improvements: Updates frequently include fixes for bugs and enhancements that make the apps run smoother and more reliably.
    • Security Patches: App updates, especially for default apps, can contain critical security patches that protect your device and data from vulnerabilities.
    • Troubleshooting: If a default app is misbehaving, a manual update can sometimes resolve the issue.

    Samsung’s default apps come from two primary sources: the Google Play Store (for Google-developed apps and many third-party apps) and the Galaxy Store (for Samsung-specific apps like Samsung Health, Samsung Notes, and the Camera app). We’ll cover both.

    Method 1: Updating Samsung Default Apps via the Google Play Store

    Many pre-installed apps on your Samsung phone, including Google apps (like Gmail, Maps, YouTube) and some non-Samsung system apps, are updated through the Google Play Store.

    1. Open the Google Play Store: Locate the Play Store app icon on your home screen or in your app drawer and tap to open it.
    2. Access Your Profile: In the top right corner of the screen, tap your profile icon (usually your Google profile picture).
    3. Go to “Manage apps & device”: From the menu that appears, tap on Manage apps & device.
    4. Check for Updates: You’ll see an “Updates available” section. Tap on Updates available or “See details” to view the list of apps with pending updates.
    5. Update Apps:
      • To update all apps at once, tap Update all at the top of the list.
      • To update individual apps, scroll through the list and tap the Update button next to the specific app you want to update.
    6. Wait for Installation: The updates will download and install. You might see a progress bar for each app. Once an app is updated, it will disappear from the “Updates available” list.

    Method 2: Updating Samsung Default Apps via the Galaxy Store

    The Galaxy Store is Samsung’s own app store, and it’s where you’ll find updates for many of the core Samsung-developed applications unique to your Galaxy device. This includes apps like Samsung Internet, Samsung Notes, Samsung Health, the Camera app, Bixby, and more.

    1. Open the Galaxy Store: Locate the Galaxy Store app icon (often found in the Samsung folder in your app drawer) and tap to open it.
    2. Access the Menu: In the bottom right corner of the screen, tap the Menu icon (three horizontal lines).
    3. Go to “Updates”: In the menu, tap on Updates.
    4. Check for Updates: The Galaxy Store will display a list of Samsung apps with available updates.
    5. Update Apps:
      • To update all displayed apps, tap Update all at the top.
      • To update specific apps, tap the circular arrow icon next to the individual app you wish to update.
    6. Wait for Installation: The updates will download and install. You can leave the Galaxy Store app, and the updates will continue in the background.

    Checking for System Software Updates (Firmware)

    While not “app” updates in the traditional sense, system software updates (also known as firmware updates) for your Samsung Galaxy phone often include updates to core system applications and components that aren’t managed by the Play Store or Galaxy Store. Keeping your phone’s software up to date is equally, if not more, important.

    1. Open Settings: Swipe down from the top of your screen and tap the gear icon (Settings).
    2. Scroll to “Software update”: Scroll down and tap on Software update.
    3. Download and Install: Tap on Download and install.
    4. Check for Updates: Your phone will check for any available system updates. If an update is found, follow the on-screen prompts to download and install it. This process may require your phone to restart. Ensure your battery is sufficiently charged or connected to a charger before initiating a system update.

    Tips for Smooth Updates

    • Stable Internet Connection: Always ensure you have a strong Wi-Fi connection when downloading updates to avoid interruptions and potential data charges.
    • Sufficient Storage Space: Make sure your phone has enough free storage. Updates, especially system updates, can be large.
    • Battery Level: Keep your phone charged, ideally above 50%, or connected to a power source during updates to prevent interruptions.
    • Restart After Updates: After a significant update, especially system updates, it’s a good practice to restart your phone to ensure all changes are applied correctly.
    • Understand Auto-Updates: While manual updates are useful, it’s generally recommended to keep auto-updates enabled in both the Play Store and Galaxy Store for convenience and consistent security. You can usually configure auto-updates to only occur over Wi-Fi.

    By following these steps, you can effectively manually update Samsung default apps and ensure your Galaxy device is running optimally with the latest features and security enhancements.

  • How to Enable Always-on Display in Samsung Galaxy

    How to Enable Always-on Display in Samsung Galaxy

    The Always-On Display (AOD) is a popular feature on Samsung Galaxy phones that allows you to view essential information at a glance without fully waking up your screen. This includes the time, date, battery level, and notification icons, providing immediate access to critical updates while conserving battery life compared to a fully lit screen.

    The concept of an always-on screen isn’t new. It was pioneered by manufacturers like Nokia with their AMOLED Symbian phones around 2010. Samsung significantly popularized the AOD with its Galaxy S7 series in 2016, leveraging the power efficiency of AMOLED displays. Unlike LCDs, AMOLED screens can selectively light up individual pixels, meaning black areas consume no power. This makes AOD a practical feature for displaying minimal information without significant battery drain. Over successive One UI versions, Samsung has continuously refined the AOD, adding more customization options and smart features to enhance its utility and efficiency.

    This guide will walk you through the simple steps to enable and customize the Always-On Display on your Samsung Galaxy phone, helping you make the most of this convenient feature.

    Prerequisites for Always-On Display

    Before you proceed, ensure your Samsung Galaxy phone meets these basic requirements:

    • AMOLED Display: Always-On Display is primarily designed for phones with AMOLED (or Super AMOLED) screens. While some LCD phones might have an “ambient display” feature, a true AOD with minimal battery impact is a hallmark of AMOLED technology. Most modern Samsung flagships and many mid-range Galaxy A and M series phones feature AMOLED displays.
    • Software Version: Ensure your device is running a relatively recent version of One UI (e.g., One UI 3.0 or later). While the steps remain largely consistent, minor interface variations may occur across different One UI versions (e.g., One UI 5, One UI 6, One UI 6.1). You can check your software version in Settings > About phone > Software information.

    Step-by-Step Guide to Enabling Always-On Display

    There are two main ways to enable and access the settings for Always-On Display on your Samsung Galaxy phone.

    Method 1: Through the Settings App (Recommended for Full Customization)

    This method provides access to all AOD settings and customization options.

    1. Open Settings:
      • Swipe down from the top of your screen to open the Quick Panel.
      • Tap the Settings gear icon (⚙️) in the top right corner.
      • Alternatively, find and tap the Settings app icon in your app drawer.
    2. Navigate to Lock Screen Settings:
      • Scroll down and tap on Lock screen and AOD (or simply Lock screen on some older One UI versions).
    3. Enable Always On Display:
      • You will see an option labeled Always On Display. Tap the toggle switch next to it to turn it On.
      • Important: If the toggle is grayed out, ensure Power saving mode is disabled. AOD is automatically turned off when Power saving mode is active to conserve battery. You can disable Power saving mode from the Quick Panel or in Settings > Battery and device care > Battery.
    4. Customize AOD Settings:
      • Once enabled, tap directly on the “Always On Display” text (not the toggle) to enter its detailed settings menu.
      • Here, you’ll find several options to configure its behavior:
        • When to show:
          • Tap to show (for 10 seconds): This is often the default. The AOD appears briefly after you tap the screen. This is a good balance for battery life.
          • Show always: The AOD remains continuously visible whenever your phone screen is off. This uses the most battery but offers constant information.
          • Show as scheduled: You can set specific start and end times for when the AOD will be active (e.g., turn off at night). Tap Set schedule to define your preferred hours.
          • Show for new notifications: The AOD will only appear when you receive a new notification and will remain on until you clear or view it. This is highly battery-efficient and useful if you primarily want AOD for alerts.
        • Clock style: Tap this option to choose from a wide variety of clock styles, including digital, analog, world clocks, and even images or GIFs (depending on your One UI version). You can also customize colors.
          • Note for One UI 6.1 and later: The primary clock style customization for AOD is now integrated with the Lock screen customization. Long-press your Lock screen, tap Customize, and then tap the clock to change its style and appearance. These changes will reflect on your AOD.
        • Show music information: Toggle this on to display music playback controls and information when media is playing.
        • Screen orientation: Choose between Portrait or Landscape orientation for your AOD.
        • Auto brightness: It’s generally recommended to keep Auto brightness enabled for AOD as it automatically adjusts the brightness based on ambient light, optimizing both visibility and battery efficiency. You can toggle it off for manual control if preferred.
    5. Save Changes: Your changes are typically saved automatically as you make them. Simply go back or exit the Settings app.

    Method 2: Using the Quick Panel Toggle (For Quick On/Off)

    The Quick Panel provides a fast way to turn Always-On Display on or off, but it doesn’t offer customization options.

    1. Open the Quick Panel: Swipe down twice from the top of your screen to fully expand the Quick Panel.
    2. Locate the AOD Toggle: Look for the “Always On Display” button. It usually has an icon resembling a clock or a screen with information.
      • Tip: If you don’t see it, you might need to add it to your Quick Panel. Tap the Edit button (often a pencil icon) or the three vertical dots in the Quick Panel, then select Edit buttons. Drag the Always On Display toggle from the available buttons to your active Quick Panel area.
    3. Toggle On/Off: Tap the “Always On Display” button to quickly enable or disable the feature.

    Customizing AOD Widgets (FaceWidgets)

    Beyond the basic clock and notifications, Samsung AOD allows you to display other useful information through FaceWidgets (or simply “Widgets” in newer One UI versions).

    1. Open Settings: Go to Settings > Lock screen and AOD.
    2. Access Widgets: Tap on Widgets.
    3. Enable Desired Widgets: You’ll see a list of widgets such as:
      • Music: Control music playback.
      • Next alarm: See your upcoming alarm.
      • Schedule: View calendar events.
      • Weather: Get current weather information.
      • Digital wellbeing: See screen time.
      • Bixby Routines: If you have active routines, relevant info might show.
      • SmartThings scenes: Control smart home devices.
      • Toggle on the widgets you want to appear on your AOD.
    4. How to Use Widgets on AOD: When your AOD is active, double-tap the clock area. You can then swipe left or right to cycle through your enabled widgets.

    Battery Impact of Always-On Display

    While AOD is optimized for low power consumption, it still uses some battery.

    • Minimal Drain: On AMOLED displays, AOD typically consumes around 1-3% of battery per hour, though this can vary based on brightness, complexity of the chosen clock/image, and the amount of information displayed.
    • Optimizations: Samsung uses several optimizations to reduce drain:
      • Pixel Shifting: The displayed elements subtly shift position over time to prevent screen burn-in.
      • Proximity Sensor: The AOD may turn off if your phone is in a pocket or face down, detected by the proximity sensor.
      • Adaptive Brightness: Adjusts brightness based on ambient light.
    • Tips to Minimize Drain:
      • Use “Tap to show” or “Show for new notifications” instead of “Show always.”
      • Schedule AOD to turn off at night or during periods of non-use.
      • Keep Auto brightness enabled.
      • Choose a simpler clock style rather than complex images or animations.

    Conclusion

    The Always-On Display is a quintessential feature for Samsung Galaxy phone users, offering a perfect blend of convenience and efficiency. By following these steps, you can easily enable and fine-tune your AOD to display the information most relevant to you, exactly when you need it, all while maintaining excellent battery performance. Embrace the subtle intelligence of AOD to make your smartphone experience even more seamless and personalized.

    FAQ

    Q1: Is Always-On Display available on all Samsung Galaxy phones?

    Always-On Display (AOD) is primarily available on Samsung Galaxy phones equipped with an AMOLED (or Super AMOLED) display. This includes most flagship models (S series, Z series) and a growing number of mid-range Galaxy A and M series devices. If your phone has an LCD screen, it typically won’t have a true AOD feature, though it might have a similar “ambient display” that lights up the entire screen briefly for notifications.

    Q2: Does Always-On Display drain a lot of battery?

    Always-On Display does consume a small amount of battery, but it’s generally minimal on AMOLED displays. It typically uses around 0.5% to 3% of battery per hour, depending on your settings (e.g., “Show always” uses more than “Tap to show”), brightness, and the complexity of the displayed content. Samsung has optimized it to be highly efficient by lighting only necessary pixels and using proximity sensors to turn it off when not needed.

    Q3: Why is Always-On Display grayed out on my Samsung phone?

    If the Always-On Display option is grayed out, it’s most likely because Power saving mode is currently enabled on your device. To enable AOD, you must first disable Power saving mode. You can find this setting in your Quick Panel or under Settings > Battery and device care > Battery.

    Q4: Can I customize what information appears on the Always-On Display?

    Yes, Samsung’s Always-On Display is highly customizable. You can choose different clock styles, add images or GIFs, display music information, and enable various widgets (like weather, calendar, and alarms). In newer One UI versions (e.g., One UI 6.1), clock style customization is integrated with the Lock screen editing features.

    Q5: How do I make Always-On Display only show for new notifications?

    To set Always-On Display to appear only when new notifications arrive, go to Settings > Lock screen and AOD > Always On Display. Under the “When to show” options, select “Show for new notifications.” This is a very battery-efficient way to use AOD, acting like an advanced notification LED.

  • How to Hide Status Bar Icons on Samsung

    How to Hide Status Bar Icons on Samsung

    The status bar on your Samsung Galaxy phone, located at the very top of your screen, is a crucial area. It provides glanceable information about your device’s current state: network signal, Wi-Fi connectivity, battery level, time, and, importantly, notification icons from various apps. While incredibly useful, a crowded status bar can sometimes feel overwhelming or visually cluttered, especially if you have many persistent notifications or active system features.

    Historically, Android, and by extension Samsung’s One UI, has given users some control over what appears in this space. Early Android versions had a “System UI Tuner” for basic status bar customizations, but its accessibility varied. Samsung, with its One UI overlay, has offered more robust customization options, particularly through its Good Lock suite of apps. This allows users to tailor their experience beyond the standard Android offerings, including granular control over status bar icons.

    This guide will walk you through the various methods to hide status bar icons on your Samsung Galaxy phone, helping you achieve a cleaner, more minimalist look while ensuring you don’t miss crucial information.

    Understanding Status Bar Icons

    Before we dive into hiding them, let’s quickly identify the types of icons you’ll typically see in your status bar:

    • System Icons: These represent the fundamental status of your phone, such as Wi-Fi, cellular signal, battery, Bluetooth, alarm, NFC, location, airplane mode, etc. They are always on the right side (or grouped with essential icons on the left in some older One UI versions) of the status bar.
    • Notification Icons: These appear on the left side of the status bar and indicate new notifications from your apps (e.g., new message, email, app update, music playback).

    The ability to hide these icons gives you more control over your device’s aesthetics and can reduce visual noise.

    Method 1: Using Built-in Notification Settings (For Notification Icons)

    Samsung One UI allows you to manage how notification icons are displayed, offering a degree of control over the left side of your status bar. This method primarily affects notification icons, not system icons like Wi-Fi or battery.

    1. Open Settings: Swipe down from the top of your screen to open the Quick Panel, then tap the Settings gear icon (⚙️). Alternatively, find and tap the Settings app icon in your app drawer.
    2. Navigate to Notification Settings: Scroll down and tap on Notifications.
    3. Access Advanced Settings: Tap Advanced settings.
    4. Manage Notification Icons:
      • Show notification icons: Tap on this option. You’ll typically see a few choices:
        • All notifications: Shows icons for every pending notification. This can quickly clutter your status bar.
        • 3 most recent: Shows icons for only the three most recent notifications. Older notifications will be represented by a dot. This is a good balance for many users.
        • Number of notifications: Displays a number indicating how many notifications you have, without showing individual app icons. This is quite minimalist.
        • None: Hides all notification icons from the status bar. You will still see them in the notification panel when you swipe down, but not at the top of your screen.
      • Choose “Number of notifications” or “None” to effectively hide most or all of your notification icons from the status bar.
    5. Hide Battery Percentage (Optional but related): While not a notification icon, the battery percentage can also contribute to clutter.
      • From the Notifications > Advanced settings screen, scroll down and toggle off Show battery percentage. The battery icon will still be visible, but the exact percentage number will be hidden.

    Method 2: Using Samsung’s Good Lock Suite (QuickStar Module) – For System Icons

    For granular control over system icons (like Wi-Fi, Bluetooth, alarm, NFC, etc.), Samsung offers a powerful customization suite called Good Lock. Within Good Lock, the QuickStar module specifically allows you to hide these often-persistent icons. This is the most comprehensive way to clean up the right side of your status bar.

    Important Note: Good Lock and its modules are official Samsung apps, but they are not pre-installed. You need to download them from the Galaxy Store. Good Lock modules are updated periodically, so ensure you have the latest versions for full functionality.

    Step 2.1: Download and Install Good Lock & QuickStar

    1. Open the Galaxy Store: Find the Galaxy Store app icon on your Home screen or in the App Drawer and tap it.
    2. Search for Good Lock: In the Galaxy Store, tap the search icon (magnifying glass) and type “Good Lock.” Tap on the Good Lock app from the search results.
    3. Install Good Lock: Tap the Install button to download and install the Good Lock app.
    4. Open Good Lock: Once installed, open the Good Lock app.
    5. Install QuickStar: Inside Good Lock, you’ll see a list of various modules. Scroll down and find QuickStar. Tap the download icon next to it to install the QuickStar module. Good Lock will redirect you to the Galaxy Store to download QuickStar.
      • Pro Tip: If you’re having trouble finding it, use the search bar within Good Lock or Galaxy Store for “QuickStar.”
    6. Open QuickStar (from Good Lock): After QuickStar is installed, go back to the Good Lock app and tap on the QuickStar module to open it.

    Step 2.2: Hide System Indicator Icons with QuickStar

    1. Toggle QuickStar On: Inside the QuickStar module, ensure the main toggle at the top is On.
    2. Access “Visibility of indicator icons”: Tap on the option labeled “Visibility of indicator icons”.
    3. Toggle Off Desired Icons: You’ll see a comprehensive list of system icons. Each icon has a toggle next to it.
      • Scroll down and toggle off any icon you wish to hide from your status bar.
      • Examples of icons you can hide:
        • Alarm: If you prefer not to see the alarm clock icon when an alarm is set.
        • Bluetooth: If you know Bluetooth is always on and don’t need the constant visual reminder.
        • Wi-Fi: If you’re always connected and don’t need the icon.
        • NFC: If you keep it on but rarely use it.
        • Battery icon: You can hide the battery icon entirely, especially if you opted to show only the percentage (though most prefer to see at least the icon).
        • Network (IMS network icon): This can vary by carrier but might show an icon related to VoLTE/VoWiFi.
        • Modes and Routines: If you activate a Bixby Routine or Mode (e.g., Sleep Mode, Driving Mode), a specific icon often appears. QuickStar allows you to hide these.
        • Device Care: An icon related to device optimization sometimes appears.
        • Location: The location icon that shows when an app is using your location.
    4. Observe Changes: As you toggle off an icon, it will disappear from your status bar in real-time.
    5. Go Back: Once you’ve made your selections, simply go back to the previous screen or exit QuickStar. Your changes are automatically saved.

    What about the Clock? QuickStar also allows you to hide the clock from the status bar.

    • Within QuickStar, go to “Clock settings”.
    • You can then choose to “Hide” the clock completely, or even change its position (left, right, or center).

    Considerations When Hiding Icons

    • Awareness: While hiding icons creates a cleaner look, remember that some icons provide important status updates. For instance, hiding the Wi-Fi icon means you won’t immediately know if your phone has disconnected from Wi-Fi.
    • Notification Drawer: Even if you hide notification icons from the status bar, they will still be visible in your notification drawer when you swipe down from the top of the screen. This ensures you don’t miss any critical alerts.
    • Battery Drain (Minimal): Hiding icons via these methods has a negligible impact on battery life. The icons are visual indicators, not significant background processes.
    • Updates: After a One UI update, especially a major one, sometimes Good Lock modules might need to be updated to ensure full compatibility. If you find icons reappearing or QuickStar not working, check the Galaxy Store for updates to Good Lock and QuickStar.

    Conclusion

    A clean and uncluttered status bar can significantly enhance your Samsung Galaxy phone’s aesthetic appeal and user experience. By leveraging the built-in notification settings for app alerts and, more powerfully, by utilizing Samsung’s Good Lock suite with the QuickStar module for system indicators, you gain precise control over what information is constantly displayed at the top of your screen. Take the time to customize these settings to achieve your ideal, minimalist, yet informative status bar.

    FAQ

    Q1: Can I hide the battery icon from the status bar on my Samsung phone?

    Yes, you can. With Samsung’s Good Lock app and the QuickStar module, you can specifically toggle off the battery icon from the list of “Visibility of indicator icons.” You can also choose to hide just the battery percentage via Settings > Notifications > Advanced settings.

    Q2: Will hiding status bar icons prevent me from receiving notifications?

    No, hiding status bar icons only affects their visibility at the top of your screen. You will still receive all notifications, and they will be accessible in your notification drawer when you swipe down. This feature is purely for visual decluttering.

    Q3: Is the Good Lock app safe to use on my Samsung phone?

    Yes, Good Lock is an official suite of customization apps developed by Samsung Electronics. It is perfectly safe to download and use from the Galaxy Store. It provides advanced customization options that are not typically available in the standard One UI settings.

    Q4: How do I get Good Lock and QuickStar on my Samsung phone?

    You can download both Good Lock and its QuickStar module directly from the Samsung Galaxy Store. Simply open the Galaxy Store app, search for “Good Lock,” install it, and then open Good Lock to find and install the “QuickStar” module.

    Q5: Can I hide the clock from the status bar on my Samsung phone?

    Yes, you can. Using the QuickStar module within the Good Lock app, you can access “Clock settings” and choose to “Hide” the clock from your status bar. You can also change its position (left, right, or center) from here.

  • How to Fix Blurry Pictures on Samsung Camera

    How to Fix Blurry Pictures on Samsung Camera

    Great content—thorough and practical! To make it feel more naturally human and engaging, I’ll refine the tone, vary the sentence flow, and weave in subtle imperfections, like personal asides or slightly uneven thoughts. This will enhance readability and relatability without cutting content or changing factual information.

    Why Are My Smartphone Photos Blurry? (And How to Fix Them)

    Struggling with blurry smartphone photos? Yeah, you’re not alone. It’s frustrating—especially when you think you’ve nailed the shot—only to find it’s soft and hazy when you look back. But here’s the good news: most blurry pictures aren’t the result of a bad camera. Often, it just comes down to a few small tweaks in how you shoot.

    Let’s break down the most common causes and, more importantly, how to fix them so your photos come out sharp and crisp every time.

    Understanding Why Your Smartphone Photos Are Blurry

    Before we dive into the fixes, it helps to understand why your photos might be turning out blurry. Usually, it’s one of these:

    1. Camera Shake – Probably the top culprit. Even a subtle hand movement during the shot—especially in low light—can make things go fuzzy.
    2. Focus Issues – If the camera latches onto the wrong subject (or misses altogether), your intended subject ends up soft and undefined.
    3. Subject Movement – When the subject is moving quickly, it can blur even if your hands are steady.
    4. Dirty Lens – A simple smudge or speck of dust can scatter light and haze your shot.
    5. Software Glitches – Occasionally, the camera app might just be having a moment.

    Let’s go through how to tackle each of these.

    1. Stabilize Your Phone (Beat the Camera Shake)

    This is the big one—especially when shooting in dim light.

    • Hold Steady with Both Hands: Always grip your phone with two hands for better control.
    • Brace Yourself: Elbows tucked in or resting on a surface? Even better. Stability really helps.
    • Tripod or Gimbal: If you’re getting serious about phone photography—or just hate blurry night shots—a mini-tripod or gimbal is a game changer.
    • Lean Against Something: Wall, railing, parked car… whatever’s around. It helps reduce shake.
    • Self-Timer Trick: Even the act of tapping the shutter button can jostle your phone slightly. A 2–3 second timer gives your hands time to settle.
    • Volume Buttons or Bluetooth Remote: Instead of tapping the screen, use the volume buttons as a shutter. Or a remote shutter if you have one. It’s a subtle change, but it makes a difference.
    1. Ensure Proper Focus (Avoid Soft, Out-of-Focus Shots)

    If your camera isn’t locking onto the right part of the scene, it doesn’t matter how steady your hands are.

    • Tap to Focus: Always tap on the subject before you shoot. This tells your camera where to focus. You’ll usually see a box or circle appear.
    • AE/AF Lock: If your subject is moving slightly—or you want to recompose after focusing—tap and hold. This locks both focus and exposure.
    • Clean Your Lens: It’s easy to forget, but a quick wipe with a microfiber cloth can make a night-and-day difference. Avoid your shirt—it tends to smear more than it cleans.
    • Mind the Minimum Focus Distance: Get too close and your camera simply can’t focus. If that keeps happening, back up a little.
    1. Handle Moving Subjects (Minimize Motion Blur)

    Capturing people, pets, or anything that’s not sitting still? You’ll want to tweak your approach.

    • Good Light Helps: More light = faster shutter speed = less blur. If possible, shoot moving subjects in daylight or a well-lit space.
    • Use Burst Mode: Just hold down the shutter button. You’ll get a rapid-fire sequence of shots, and chances are one will be sharp.
    • Anticipate Movement: Try to snap the shot just before the motion peaks—like when someone’s mid-jump or pausing between steps.
    • Pan with the Subject: Move your phone smoothly along with your subject as you shoot. It’s tricky, but when done right, the subject stays sharp while the background blurs—a nice effect!
    • Pro Mode = Manual Control: If your phone supports it, increase shutter speed manually (try 1/250s or faster). But remember: faster shutter = darker image, so bump the ISO or add light if needed.
    1. Troubleshoot Camera Glitches

    Sometimes the camera itself is just being… temperamental.

    • Restart the App: Force close it, then reopen.
    • Restart the Phone: Classic fix, but hey—it works.
    • Clear the Camera App’s Cache:
      • Go to Settings > Apps.
      • Find Camera.
      • Tap Storage & cache, then hit Clear cache (not data—that resets your settings).
    • Check for Updates:
      • Go to Settings > System > Software update.
      • Install any available updates—they often fix bugs and improve camera performance.
    • Inspect for Physical Damage: Cracks, chips, or deep scratches on the lens can ruin sharpness. If the blur seems persistent and mechanical, this could be why.
    • Remove the Case (If Needed): Some cases sit too close to the lens or reflect light weirdly. Try shooting without the case and see if there’s a difference.
    1. Use Post-Processing (For Slightly Blurry Photos)

    If the blur isn’t too bad, you might be able to rescue it after the fact.

    • Sharpening Tools: Apps like Snapseed, Lightroom Mobile, and even Google Photos have simple sharpening tools. Use lightly—overdoing it creates weird artifacts.
    • AI-Based Enhancements: Some newer apps include AI sharpening or denoising. Results vary, but they’re worth trying for photos that are just a little off.

    Final Thoughts

    Most blurry smartphone photos aren’t disasters—they just need a few tweaks to avoid. Whether it’s steadying your hands, locking focus, or learning to anticipate movement, a little technique goes a long way.

    And if you do end up with a blurry shot now and then? It happens to everyone. Learn from it, experiment, and don’t be afraid to try again. Sharp, clean shots are within reach—you just need to know where to look.

  • How to Reset Samsung Chromebook to Factory Settings

    How to Reset Samsung Chromebook to Factory Settings

    Whether your Samsung Chromebook feels sluggish, you’re preparing to pass it along to someone else, or you simply want to start fresh—resetting it is a smart move. On a Chromebook, this reset process is known as a Powerwash. It’s surprisingly straightforward and brings your device back to its original factory state.

    In this guide, I’ll walk you through the different ways to reset your Samsung Chromebook. We’ll start with the standard reset through settings, show how to do it from the sign-in screen, and explore what to try if those options aren’t available. Having gone through this process a few times myself, I promise—it’s not as intimidating as it sounds.

    Before You Begin: Back Up Your Data

    This part’s important. A Powerwash wipes out all local data stored on the Chromebook. That includes:

    • Files in the Downloads folder
    • All user accounts and their associated files
    • Installed apps
    • Custom settings or configurations

    Anything synced with your Google Account—like bookmarks, saved passwords, and extensions—is backed up automatically to the cloud. But if you’ve saved files directly on the device, you’ll want to move them elsewhere.

    Here’s how to back up your files:

    1. Plug in an external hard drive or USB flash drive.
    2. Or, open the Files app and upload critical files from Downloads to Google Drive.

    Once you’re sure everything important is backed up, you’re ready to reset.

    Method 1: The Standard Powerwash (From Settings)

    This is the most commonly used method—ideal if you can still log into your Chromebook without issues.

    Step-by-step:

    1. Click the time in the bottom-right corner to open Quick Settings.
    2. Tap the gear icon to access full Settings.
    3. In the left-hand menu, scroll down and click Advanced to expand more options.
    4. Under Reset settings, find the Powerwash section.
    5. Click Reset next to Powerwash. A pop-up will appear—confirm by clicking Restart.

    The device will reboot and begin the Powerwash. Give it a few minutes, and you’ll be taken to the welcome/setup screen as if it were brand new.

    Method 2: Reset From the Sign-In Screen

    If you’re locked out or the system won’t load past the login page, no worries—you can still reset.

    Here’s what to do:

    • At the sign-in screen (before typing your password), press and hold Ctrl + Alt + Shift + R.
    • A Powerwash prompt will appear. Click Restart.
    • After the reboot, confirm the Powerwash when prompted and click Continue.

    This route is especially handy if your user profile is corrupted or causing login issues. I’ve found it to be a real lifesaver when other methods weren’t accessible.

    Method 3: The Hard Reset (For Hardware Glitches)

    Let’s clarify something here: a hard reset is not the same as a Powerwash. It won’t erase your data. Instead, it reboots the hardware components like the keyboard or touchpad and can fix temporary freezes or glitches.

    To perform a hard reset:

    1. Turn off your Chromebook.
    2. Hold down the Refresh key (the circular arrow on the top row).
    3. While holding it, press the Power button.
    4. Release the Power button, then let go of the Refresh key.

    Your Chromebook should power back up. It’s a quick fix that clears the system’s RAM and often helps with general unresponsiveness. But if problems persist, a full Powerwash might be your next step.

    By using these methods, you can confidently reset your Samsung Chromebook—whether you’re troubleshooting a glitch or giving it a fresh start. It’s easier than you’d think and takes just a few minutes when you know the steps.

  • How to Enable Fingerprint Unlock on Samsung Galaxy

    How to Enable Fingerprint Unlock on Samsung Galaxy

    Unlocking your Samsung Galaxy phone with your fingerprint isn’t just a fancy trick—it’s actually one of the quickest and most secure ways to access your device. If you haven’t set it up yet, or if you just want to fine-tune it, this guide will walk you through everything step by step.

    Why Use Fingerprint Unlock?

    There are a few solid reasons to make fingerprint unlock your go-to method:

    • Speed: No typing or swiping patterns. Just a quick touch.
    • Convenience: It’s always right at your fingertips (literally).
    • Security: Your fingerprint is unique to you, which makes it tough for anyone else to get in.
    • Extra Uses: Beyond unlocking, it can be used for logging into secure apps or making payments via Samsung Pay.

    Understanding the Fingerprint Sensor Types

    Depending on your model, Samsung uses two main types:

    • Ultrasonic In-Display Sensors: Found in newer devices like the Galaxy S10 and up. The sensor is under the screen.
    • Capacitive Physical Sensors: These are on older or budget models. You might find them on the back, side, or home button.

    The setup is mostly the same, but the finger placement spot will vary.

    Setting Up Fingerprint Unlock on Samsung Galaxy

    Let’s go through this in order, starting from scratch:

    Step 1: Set a Secure Screen Lock (If You Haven’t Yet)

    You’ll need a backup security method like a PIN, pattern, or password before you can use fingerprint unlock.

    1. Open Settings: Swipe down the Quick Settings panel and tap the gear icon, or find Settings in the app drawer.
    2. Go to Security Settings: Tap on Security and privacy (older models might say Biometrics and security).
    3. Choose Screen Lock Type: Tap Screen lock type.
    4. Set Your Backup Method: If prompted, choose and set up a PIN, Pattern, or Password. Don’t forget it—you’ll need it if fingerprint recognition fails.

    Step 2: Register Your Fingerprints

    Once the backup lock is in place, it’s time to add your fingerprints.

    1. Back to Security Settings: Return to Settings > Security and privacy > Biometrics.
    2. Select Fingerprints: Tap Fingerprints. Enter your PIN, pattern, or password to proceed.
    3. Add Fingerprint: Tap Add fingerprint.
    4. Follow the Prompts:
      • In-Display Sensor: You’ll see a screen prompt showing where to place your finger. Keep lifting and pressing slightly differently until it hits 100%.
      • Capacitive Sensor: Place your finger repeatedly on the physical sensor until the registration is complete.
    5. Complete the Scan: You might need to adjust the angle to get the edges of your fingerprint.
    6. Add More for Convenience:
      • Your main unlocking finger (probably your thumb).
      • Another finger from your other hand.
      • Multiple angles of the same finger (optional, but helpful).
    7. Tap Done when you’re satisfied.

    Step 3: Turn On Fingerprint Unlock

    Make sure fingerprint unlock is actually activated.

    1. In the Fingerprints menu, find the toggle next to Phone unlock (sometimes it might say Screen unlock).
    2. Make sure it’s switched ON. It usually is by default, but it’s worth double-checking.

    Managing Fingerprints

    You can always go back and tweak things later:

    1. Go to Settings > Security and privacy > Biometrics > Fingerprints.
    2. Authenticate: Enter your PIN, pattern, or password.
    3. Edit Your Prints:
      • To rename: Tap on a fingerprint, then give it a name like “Right Thumb.”
      • To delete: Tap the fingerprint, then hit Remove or tap the trash icon.

    Tips for Better Recognition

    • Keep It Clean: Dirty fingers or smudged sensors reduce accuracy.
    • Cover the Whole Sensor: During registration, move your finger slightly each time.
    • Register Multiple Angles: It helps with off-center unlock attempts.
    • Apply Even Pressure: Try to use the same touch style each time.
    • Trouble? Re-register: If one finger’s always hit-or-miss, delete and redo it.

    Wrapping Up

    Fingerprint unlock adds speed, security, and just a bit of tech magic to your everyday phone use. It takes only a few minutes to set up, and it makes unlocking your Samsung Galaxy a breeze.

  • How to Hide Photos on Samsung Phone Without Apps

    How to Hide Photos on Samsung Phone Without Apps

    Keeping personal photos private is something most of us care about. Thankfully, if you’re using a Samsung Galaxy phone, you don’t need to install any extra apps to get some solid privacy features. Samsung already includes tools like Secure Folder and the ability to hide albums right in the Gallery app. Here’s a detailed look at how to use them effectively.

    1. Using the Secure Folder: The Most Robust Method

    Samsung’s Secure Folder is arguably your best option. It’s an encrypted space protected by Samsung Knox, with its own lock—like a PIN, password, or biometric check. This is where your private content can stay, well, private.

    Setting Up Secure Folder (If You Haven’t Already)

    1. Open Settings: Swipe down from the top of your screen, tap the gear icon.
    2. Navigate to Security: Tap “Security and privacy” or “Biometrics and security” depending on your phone.
    3. Find Secure Folder: Tap “More security settings,” then “Secure Folder.”
    4. Sign in: You’ll need a Samsung Account. Sign in or create one.
    5. Set Lock Type: Choose how you want to secure the folder—PIN, password, pattern, or fingerprint.
    6. Confirm Setup: Once done, the Secure Folder icon will appear in your Apps.

    Moving Photos to Secure Folder

    Method A: From the Gallery App

    1. Open the Gallery.
    2. Select the photos or videos you want to hide.
    3. Tap the three dots or “More.”
    4. Choose “Move to Secure Folder.”
    5. Authenticate with your Secure Folder lock.
    6. The files will now only be accessible inside Secure Folder.

    Method B: From Secure Folder

    1. Open Secure Folder and authenticate.
    2. Open the Gallery within it.
    3. Tap the three dots > “Add items.”
    4. Choose source (Gallery, My Files, etc.).
    5. Select photos and tap “Move.”

    Accessing Hidden Photos

    1. Open Secure Folder.
    2. Enter your credentials.
    3. Open the Gallery app inside Secure Folder to view your hidden files.

    Hiding the Secure Folder Icon (Optional)

    If you want even more discretion:

    1. Open Secure Folder > three dots > Settings.
    2. Toggle off “Show icon on Apps screen.”
    3. Confirm with “Hide.”

    To access it again, use the Quick Panel or go to Settings > Security and privacy > Secure Folder.

    1. Hiding Albums in the Gallery App

    Not as secure as Secure Folder, but useful for quickly tucking away albums:

    1. Open Gallery > Albums.
    2. Tap three dots > “Hide albums.”
    3. Toggle off albums you want to hide.

    Unhiding Albums

    1. Go to Gallery > Albums > More > “Hide albums.”
    2. Toggle albums back on.

    Note: This doesn’t encrypt files. Anyone who knows where to look can find or unhide them.

    1. Creating a “.nomedia” File (For Advanced Users)

    This method prevents your media from showing up in apps like Gallery, without actually securing it.

    Steps:

    1. Open My Files.
    2. Navigate to the folder with your photos.
    3. (Optional) Create a new folder (e.g., “MyHiddenPhotos”).
    4. Inside that folder, tap three dots > “Create file.”
    5. Name the file: .nomedia (with a dot at the beginning, no extension).
    6. Move your photos into that folder.
    7. Restart your phone (helps the change take effect).

    To View or Unhide:

    1. Open My Files > More > Settings > Enable “Show hidden files.”
    2. Navigate to your folder.
    3. Delete the .nomedia file.
    4. Restart phone or clear Gallery cache if needed.

    Caution: This doesn’t encrypt anything. Anyone with file access can still find your hidden content.

    Choosing the Right Method

    • Use Secure Folder if you want real security with encryption and authentication.
    • Hide Albums for simple decluttering or light privacy.
    • .nomedia method if you know what you’re doing and want a lightweight option to hide files from media apps.

    By getting comfortable with these built-in features, you can manage your photo privacy with confidence—no sketchy apps required.

  • How to Enable Two-Step Verification on Samsung account

    How to Enable Two-Step Verification on Samsung account

    In today’s digital world, safeguarding your online accounts is more critical than ever. Your Samsung account plays a central role in many of the brand’s services—from the Galaxy Store to Samsung Cloud, and even unlocking your device if you forget your password. That makes securing it a top priority.

    One of the most effective ways to do that? Two-step verification. Also called two-factor authentication (2FA), this feature adds a second layer of protection, making it much harder for anyone else to get into your account—even if they somehow manage to get your password.

    What is Two-Step Verification and Why Use It? Two-step verification asks for two pieces of information to verify your identity. The first is your password, and the second is usually something only you have access to—like a code sent to your phone.

    Think of your password as the front door key. Two-step verification? That’s your alarm system. Even if someone steals your key, they can’t get in unnoticed. This reduces the risk of unauthorized access dramatically and helps protect your data and control over your device.

    How to Enable Two-Step Verification You can set it up either from your Samsung Galaxy phone or via a web browser. We’ll focus on the phone method here since it’s usually quicker and more convenient for most users.

    Method 1: From Your Samsung Galaxy Phone

    1. Open Settings: Swipe down to access Quick Settings, then tap the gear icon.
    2. Tap Your Samsung Account: This is at the very top of the menu.
    3. Go to “Security and Privacy”: Scroll and tap on it.
    4. Tap “Two-step verification”: You’ll find this under “Account Security.”
    5. Tap Start or Turn On: You’ll see a quick explanation first.
    6. Verify Your Phone Number:
      • Check that the number shown is correct. If it’s not, change it.
      • Tap “Send code.”
      • Enter the 6-digit code you receive.
      • Tap “Verify.”
    7. Set Up Backup Codes:
      • These are crucial if you ever lose access to your phone.
      • Write them down and store them somewhere safe—not on your phone.
      • Tap Done or Confirm once you’ve recorded them.
    8. Done! You’ll get confirmation that two-step verification is now active.

    Method 2: Using a Web Browser Prefer a bigger screen? Here’s how to do it online:

    1. Visit account.samsung.com.
    2. Sign In with your email/phone number and password.
    3. Click on “Security” in the sidebar.
    4. Find “Two-step verification” and click on it.
    5. Follow the prompts to verify your phone and save your backup codes.

    Managing Your Two-Step Verification Settings Once it’s enabled, you can come back to this section to:

    • Update your phone number.
    • Generate new backup codes.
    • Disable the feature (not recommended, but possible).

    If You Can’t Receive a Code Traveling? Poor signal? Here’s what to do:

    • Use a Backup Code: Select the option during login.
    • Check Signal or Restart Your Phone.
    • Contact Samsung Support if you’re completely locked out.

    Final Thoughts Turning on two-step verification only takes a few minutes, but the protection it adds is massive. It’s a simple step toward stronger digital security, and it offers peace of mind knowing your account and data are better shielded from prying eyes.