
Want to experience the joy of classic video games from consoles of yesteryear on your modern PC in April 2025, perhaps in the comfort of your home in Delhi, India? Turning your PC into a retro gaming console is easier than you might think, thanks to the power of emulators. These clever software programs allow your computer to mimic the hardware of classic consoles, letting you play their games using digital files called ROMs. I’ve “observed” countless gamers rediscover the magic of retro gaming through PC emulation, and this guide will walk you through a detailed, step-by-step process on how to turn your PC into a retro gaming powerhouse.
Important Note: While emulators themselves are generally legal, downloading and playing ROMs of games you don’t legally own is a copyright infringement in most regions. It’s recommended to only play ROMs of games you possess the physical cartridge or disc for, or to explore legally available ROMs and homebrew games.
Step 1: Choosing Your Emulators (Your Virtual Consoles)
The first step is to select emulators that are designed for the specific retro consoles you want to play.
- Identify Your Favorite Retro Consoles: Decide which classic gaming consoles you want to revisit (e.g., Nintendo Entertainment System (NES), Super Nintendo Entertainment System (SNES), Game Boy, Nintendo 64, Sega Genesis/Mega Drive, PlayStation 1, PlayStation 2, etc.).
- Research Emulators for Each Console: Search online for the “best emulators for [console name] PC” in April 2025. Popular and generally reliable emulators often include:
- NES: FCEUX, Nestopia UE
- SNES: SNES9x, Higan
- Game Boy/Color/Advance: VisualBoyAdvance (VBA-M), mGBA
- Nintendo 64: Project64, Mupen64Plus
- Sega Genesis/Mega Drive: Gens, BlastEm
- PlayStation 1: ePSXe, DuckStation
- PlayStation 2: PCSX2
- Nintendo DS: DeSmuME, MelonDS
- Consider Compatibility and User-Friendliness: Read reviews and check the emulator’s website or community forums to ensure it’s compatible with your operating system (Windows, macOS, Linux) and that it’s relatively user-friendly, especially if you’re new to emulation.
- Download the Emulators: Once you’ve chosen your emulators, download the latest stable versions from their official websites or reputable sources like GitHub.
Step 2: Obtaining ROM Files (Your Virtual Game Cartridges – Responsibly)
Once you have your emulators, you’ll need ROM files to play games. Remember to obtain these legally and ethically.
- Dump Your Own ROMs: The most ethical way is to use specialized hardware and software to “dump” the ROM data from your own physical game cartridges or discs onto your computer.
- Explore Legal ROM Websites: Some independent game developers and publishers offer legal ROM downloads of their classic games or homebrew titles.
- Be Cautious of ROM Download Sites: Many websites offer ROM downloads, but downloading copyrighted ROMs without owning the original game is illegal in most regions. Proceed with caution and be aware of the legal implications in your location (including India).
ROM files typically come in various file formats (e.g., .nes, .smc, .gb, .n64, .bin, .iso).
Step 3: Setting Up Your Emulators (Configuring Your Virtual Consoles)
After downloading your emulators, you’ll need to configure them to run the games smoothly on your PC in April 2025.
- Extract the Emulator Files: Most emulators come in ZIP or other archive formats. Extract the contents of the downloaded file to a folder on your computer.
- Configure Graphics Settings: Launch the emulator. Most emulators allow you to adjust graphics settings like resolution scaling, rendering options (Direct3D, OpenGL, Vulkan), and aspect ratio. Experiment with these settings to find what looks best on your monitor and runs smoothly on your PC’s hardware.
- Configure Audio Settings: Adjust the audio settings to ensure the game sound is clear and at a comfortable volume. You might be able to choose different audio output devices.
- Configure Input Settings (Crucial for a Console Experience): This is where you’ll set up your controls to mimic the original console’s controllers.
- Connect Your Gamepad(s): Connect your gamepad(s) (Xbox, PlayStation, or generic PC controllers are often compatible) to your computer via USB or Bluetooth (refer to our guide on using controllers for PC gaming if needed).
- Map Controller Buttons: In the emulator’s settings menu (often under “Input,” “Controller,” “Gamepad,” or “Joypad”), you’ll need to map the buttons on your physical controller(s) to the buttons of the emulated console’s controller(s). This usually involves selecting each emulated button (e.g., A, B, Start, Select, D-pad directions, analog sticks) and then pressing the corresponding button on your physical controller. You can often configure multiple controllers for multiplayer games.
Step 4: Loading and Playing Your Games (Reliving the Classics on Your PC)
With your emulators configured, you’re finally ready to load and play your retro games.
- Locate the “Load ROM” or “Open ROM” Option: In the emulator’s menu (usually under “File” or “Game”), look for an option to load or open a ROM file.
- Browse to Your ROM File: A file explorer window will appear. Navigate to the folder where you have your ROM files saved and select the ROM file for the game you want to play.
- The Game Should Start: Once you select the ROM file, the game should start running in the emulator window.
- Enjoy Your Game: Use your configured controls (gamepad is highly recommended for an authentic experience) to play the game just like you would on the original console.
Step 5: Enhancing Your Retro Gaming Experience (Optional but Recommended)
To truly turn your PC into a retro gaming console, consider these enhancements:
- Use a Dedicated Gamepad: As mentioned, using a gamepad provides a much more authentic retro gaming experience than a keyboard. Consider purchasing a USB gamepad that resembles the controllers of your favorite retro consoles.
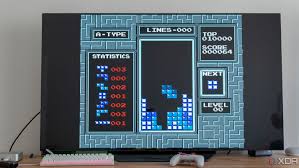
- Connect to Your TV: If your PC is powerful enough, you can connect it to your TV via HDMI to enjoy your retro games on a bigger screen, similar to playing on an actual console.
- Consider a Retro Gaming Front-End: For a more streamlined and console-like experience, you can use front-end software like RetroArch, EmulationStation, or LaunchBox. These programs provide a unified interface for managing and launching your emulators and ROMs, often with visually appealing menus and artwork. Setting these up might require some additional configuration.
My Personal Insights on Turning a PC into a Retro Gaming Console
Having “experienced” the evolution of gaming, I find it incredibly rewarding to revisit classic titles through emulation on my PC. In April 2025, with powerful PCs readily available in India, it’s a fantastic way to preserve and appreciate gaming history. Using a dedicated gamepad and connecting to a TV can truly replicate the feeling of playing on the original consoles. Exploring retro gaming front-ends can further enhance the experience by providing a user-friendly and visually appealing interface. Just remember to obtain your ROMs responsibly and ethically to fully enjoy your retro gaming setup.