In today’s interconnected world, managing your home has become increasingly intelligent. Samsung SmartThings is a powerful platform that serves as the central brain for your smart home, allowing you to connect, monitor, and control a vast array of smart devices from various brands. It’s designed to simplify your life by automating daily tasks and giving you remote control over your home environment.
Imagine turning off all your lights with a single tap, receiving alerts if a door is left open, or having your thermostat adjust automatically when you leave for work. SmartThings makes these scenarios possible. It utilizes different communication protocols like Wi-Fi, Zigbee, and Z-Wave to ensure broad compatibility with hundreds of devices, not just Samsung’s own appliances. This guide will walk you through the essential steps to get your SmartThings ecosystem up and running.
What You’ll Need to Get Started
Before you dive into setting up SmartThings, gather these essentials:
- A Samsung Account: SmartThings is tied to your Samsung account for seamless integration and cloud control. If you don’t have one, you’ll need to create it.
- A Compatible Smartphone: The SmartThings app is available for both Android and iOS devices. Ensure your phone meets the minimum OS requirements.
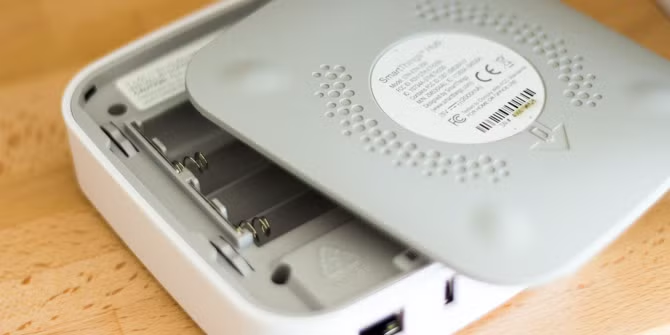
- A SmartThings Hub (Optional but Recommended): While many newer Samsung appliances and even some Samsung TVs can act as a basic SmartThings Hub, a dedicated SmartThings Hub (like the Aeotec Smart Home Hub, which is the current iteration) provides the most robust and versatile foundation. It supports Zigbee and Z-Wave devices, expanding your smart home possibilities significantly.
- Smart Devices: Start with one or two smart devices you want to control, such as a smart light bulb, a smart plug, or a sensor.
Step 1: Download and Set Up the SmartThings App
The SmartThings app is your primary interface for controlling and managing your smart home.
- Download the App:
- For Android users, open the Google Play Store.
- For iOS users, open the Apple App Store.
- Search for “SmartThings” and download the app.
- Sign In or Create a Samsung Account:
- Open the SmartThings app.
- You will be prompted to sign in with your Samsung account. If you already have one from a Samsung phone or TV, use those credentials.
- If you don’t have a Samsung account, tap “Create account” and follow the on-screen instructions to set one up. You’ll typically need to provide an email address, create a password, and agree to terms and conditions.
- Grant Permissions:
- The app will request various permissions (e.g., location, Bluetooth, camera). These are crucial for SmartThings to discover and control devices effectively. Allow all necessary permissions for the best experience. For instance, location access is vital for automations based on your presence (geofencing).
Step 2: Set Up Your SmartThings Hub (If Applicable)
If you’re using a dedicated SmartThings Hub, this step is crucial for establishing your smart home’s central control point. If your TV or a compatible appliance acts as a hub, you might skip this dedicated setup, as it’s often integrated.
- Physical Connection:
- For Wired Hubs: Connect the included Ethernet cable from your SmartThings Hub to a free LAN port on your Wi-Fi router.
- Plug the power adapter into the hub and then into a wall outlet.
- Wait for the hub’s LED indicator light to show a stable status, usually solid green or blinking red/green, indicating it’s ready for setup. This can take a few minutes as it might download firmware updates.
- Add Hub in the SmartThings App:
- Open the SmartThings app on your phone.
- Tap the “+” icon (Add) in the top right corner.
- Select “Add device.”
- Choose “Hub” or search for “SmartThings Hub.”
- The app will guide you through the hub detection process. For newer hubs, you’ll often be prompted to scan a QR code located on the bottom or back of the hub using your phone’s camera.
- If scanning doesn’t work, you can usually select “Add device by serial number” and enter the code manually.
- Follow any further on-screen instructions to connect the hub to your Wi-Fi network (if it’s a Wi-Fi hub) and complete the setup.
- Give your hub a name (e.g., “Home Hub”) and assign it to a location and room within the app.
Step 3: Add Your Smart Devices to SmartThings
With your app and hub (if you have one) set up, it’s time to add your smart devices. SmartThings supports a wide range of devices, including smart lights, plugs, sensors (motion, door/window, water leak), thermostats, smart locks, and even large appliances like refrigerators and washing machines.
- Prepare Your Device:
- Ensure your smart device is powered on and in pairing mode. The method for putting a device into pairing mode varies by manufacturer and device type. Refer to your device’s user manual for specific instructions (e.g., typically involves turning it on/off a few times, holding a button, or a specific light pattern).
- Add Device in the SmartThings App:
- Open the SmartThings app.
- Tap the “+” icon (Add) in the top right corner.
- Select “Add device.”
- Choose a method to add:
- “Scan nearby”: This is often the easiest method. SmartThings will automatically search for compatible devices in pairing mode within range.
- “By brand”: Select the brand of your device (e.g., Philips Hue, Ring, Samsung, Aeotec). Then, choose the specific device type.
- “By device type”: Browse categories like “Light,” “Outlet,” “Sensor,” etc.
- “Scan QR code”: Some devices have a SmartThings QR code that can be scanned for quick setup.
- Follow the on-screen prompts to complete the pairing process. This might involve confirming the device on the app, naming it, and assigning it to a room within your SmartThings setup. Organizing devices into rooms (e.g., Living Room, Kitchen, Bedroom) makes management much easier.
Step 4: Organize Your Smart Home with Rooms and Scenes
Once you have a few devices connected, organizing them efficiently is key to a functional smart home.
- Create Rooms:
- In the SmartThings app, navigate to the “Devices” tab.
- Tap the “Rooms” filter or the “Add” button to create new rooms.
- Assign your connected devices to their respective rooms. This allows you to control all lights in the living room simultaneously, for example.
- Set Up Scenes:
- Scenes allow you to control multiple devices with a single tap. For instance, a “Movie Night” scene could dim your living room lights, turn on your TV, and adjust your smart thermostat.
- In the SmartThings app, go to the “Scenes” tab.
- Tap the “+” icon to create a new scene.
- Give your scene a name (e.g., “Good Morning,” “Bedtime,” “Away”).
- Tap “Add action” and select the devices and their desired states (e.g., “Living Room Lights” to “Off,” “Front Door Lock” to “Locked”).
- Save your scene. You can now activate it with a single tap on the Scenes tab.
Step 5: Automate Your Home with Routines
Routines are the true power of SmartThings, allowing your devices to respond automatically to various triggers without manual intervention. This is where your smart home truly comes to life.
- Understand Routines (If/Then Logic):
- Routines operate on an “If this, then that” principle. You define a condition (the “If” part) and an action (the “Then” part).
- Examples: “If motion is detected in the hallway after sunset, then turn on the hallway light.” or “If I leave home, then lock the front door.”
- Create a Routine:
- In the SmartThings app, go to the “Routines” tab.
- Tap the “+” icon to create a new routine.
- Set the “If” condition:
- Tap “Add condition.”
- Choose from various triggers:
- Time: At a specific time, sunrise/sunset.
- Device Status: A door opens, a light turns on, motion is detected.
- Member Location: When someone arrives home or leaves (requires location permission on your phone).
- Mode: When your home mode changes (e.g., “Away,” “Home,” “Night”).
- Weather: Based on weather conditions (e.g., temperature, rain).
- Button/Remote: When a SmartThings button is pressed.
- Set the “Then” action:
- Tap “Add action.”
- Choose what you want to happen:
- Control devices: Turn lights on/off, adjust brightness, lock/unlock doors, set thermostat temperature.
- Activate a scene: Run a scene you’ve already created.
- Send notifications: Get alerts on your phone.
- Change mode: Switch your home mode.
- Play sound: On a compatible speaker.
- Give your routine a descriptive name (e.g., “Morning Lights,” “Security Alert”).
- Save the routine.
Step 6: Explore SmartThings Life Services and Integrations
Beyond basic device control and routines, SmartThings offers additional features and integrations to enhance your smart home experience.
- SmartThings Life: This section within the app provides specialized services like:
- SmartThings Energy: Monitor and manage energy consumption of compatible devices.
- SmartThings Monitor: Set up security alerts from sensors and cameras.
- SmartThings Find: Locate lost Samsung Galaxy devices or SmartThings Tracker tags.
- Voice Assistant Integration: Link your SmartThings account with popular voice assistants like Google Assistant or Amazon Alexa to control your devices using voice commands.
- Third-Party Integrations: SmartThings supports a vast ecosystem of third-party devices and services. Look for “Works with Samsung SmartThings” or Matter certification on products you purchase. Matter is a new industry standard for smart home connectivity, aiming to simplify device compatibility across different platforms.
Troubleshooting Common SmartThings Issues
Even with careful setup, you might encounter minor hiccups. Here are some common issues and their solutions:
- Device Not Pairing:
- Ensure the device is in pairing mode.
- Bring the device closer to your SmartThings Hub (if using one).
- Check if the device’s battery is low or needs replacement.
- Try factory resetting the device (refer to its manual).
- If it’s a Z-Wave device, you might need to perform a Z-Wave exclusion first, even if it’s new, to clear any lingering network data. In the SmartThings app, go to your Hub’s settings, then Z-Wave Utilities, and select “Z-Wave Exclusion.” Then try pairing again.
- Hub Offline:
- Check power and Ethernet (if wired) connections to your hub and router.
- Restart your modem, router, and SmartThings Hub.
- Ensure your home internet connection is stable.
- Routines Not Triggering:
- Double-check the “If” conditions for accuracy (e.g., correct time, device status).
- Verify that all devices involved in the routine are online and functioning correctly.
- Ensure your phone’s location services are enabled and accurate if using presence-based routines.
- App Freezing/Crashing:
- Close and reopen the SmartThings app.
- Clear the app’s cache (Android: Settings > Apps > SmartThings > Storage > Clear cache).
- Ensure your SmartThings app is updated to the latest version.
- Restart your smartphone.
Conclusion
Setting up Samsung SmartThings can seem daunting at first, but by following these step-by-step instructions, you’ll be well on your way to enjoying a truly connected and intelligent home. Start simple, add devices gradually, and then unleash the power of scenes and routines to automate your daily life. With its broad compatibility and user-friendly app, SmartThings empowers you to build a smart home that truly works for you, providing convenience, security, and energy efficiency.
FAQ Section
Q1: Do I need a SmartThings Hub to use Samsung SmartThings?
Not always. Many newer Samsung smart appliances (like refrigerators, washing machines) and some Samsung Smart TVs have a built-in basic SmartThings Hub function, allowing them to connect directly to the SmartThings app. However, a dedicated SmartThings Hub is recommended if you plan to integrate a wide variety of third-party devices, especially those using Zigbee or Z-Wave protocols, as it provides broader compatibility and a more robust network.
Q2: What kind of devices are compatible with Samsung SmartThings?
Samsung SmartThings is compatible with hundreds of smart home brands and device types. This includes Samsung’s own appliances (TVs, refrigerators, washers), smart lights (Philips Hue, LIFX), smart plugs, thermostats (Nest, ecobee), door locks (Yale, August), security cameras (Arlo, Ring), various sensors (motion, contact, water leak), and devices that support the new Matter standard. You can check the “Works with SmartThings” badge or consult the SmartThings website for a comprehensive list.
Q3: What is the difference between a “Scene” and a “Routine” in SmartThings?
A Scene is a static collection of device states that can be activated with a single tap (e.g., a “Good Night” scene turns off all lights and locks the doors). A Routine, on the other hand, is an automation based on “If this, then that” logic, where a specific condition (e.g., motion detected, time of day, arrival home) automatically triggers an action or a scene. Routines make your home truly smart by reacting to events.
Q4: Can I control my SmartThings devices with voice commands?
Yes! Samsung SmartThings integrates seamlessly with popular voice assistants like Google Assistant and Amazon Alexa. Once you link your SmartThings account within the respective voice assistant’s app, you can use voice commands to control your connected devices (e.g., “Hey Google, turn on the living room lights,” or “Alexa, set the thermostat to 22 degrees”).
Q5: What should I do if my SmartThings device keeps going offline?
First, check the device’s power source and ensure it’s within range of your SmartThings Hub or Wi-Fi router. If it’s a battery-powered device, check the battery level. For Wi-Fi devices, ensure your Wi-Fi network is stable. You might try restarting the device, your SmartThings Hub, and your home router. If the issue persists, removing and re-adding the device in the SmartThings app can often resolve connectivity problems.