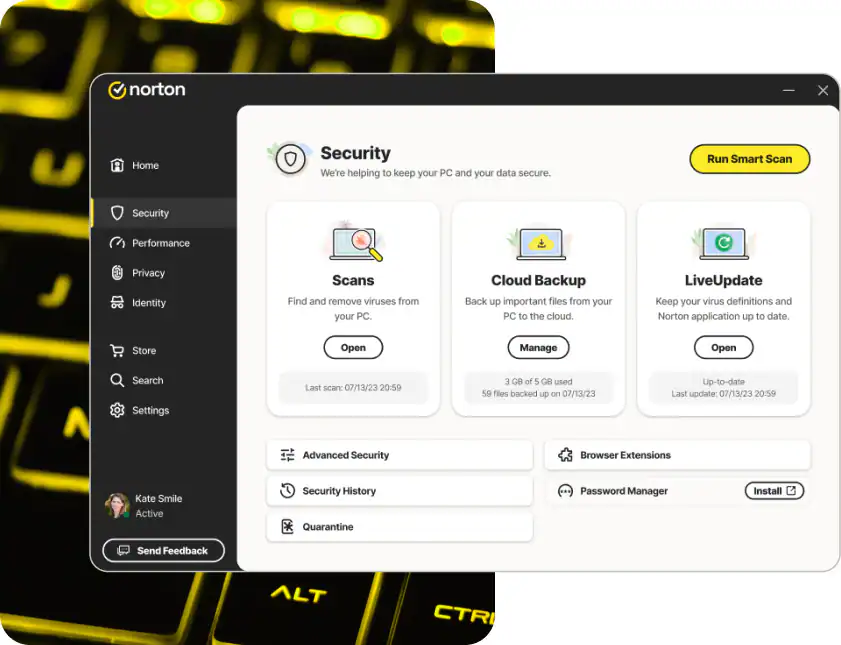
Regular antivirus scans are a crucial part of keeping your computer protected from malware in April 2025. While Norton antivirus offers real-time protection, scheduling regular full scans ensures a deeper check of your system, even when you’re not actively using your computer. I’ve personally found that automating these scans provides peace of mind and helps maintain a healthy digital environment. This guide will walk you through the step-by-step process of how to schedule antivirus scans in Norton so you can set it and forget it, knowing your system is being regularly checked for threats.
Step 1: Opening the Norton Security Application (Your Control Center)
The first step to scheduling scans is to access the main Norton Security interface.
- Locate the Norton Icon: Look for the Norton icon in your system tray (usually located in the bottom-right corner of your screen, near the clock). It typically looks like a yellow shield with a blue checkmark.
- Double-Click the Icon: Double-click the Norton icon to open the Norton Security application window.
If you can’t find the icon in the system tray, you can also search for “Norton” in the Windows Start Menu and click on the Norton Security app to open it.
Step 2: Navigating to the “Tasks” or “Security” Section (Finding the Scan Options)
Once the Norton Security window is open, you need to find the section that deals with scans and tasks.
- Look for “Tasks” or “Security”: The exact wording might vary slightly depending on your Norton product version in April 2025, but you’ll generally find an option labeled “Tasks” or “Security” on the main screen or in a left-hand menu. Click on this option.
Step 3: Finding the “Scans” Option (Accessing Scan Settings)
Within the “Tasks” or “Security” section, you should find an option related to running or scheduling scans.
- Locate “Scans”: Look for an option specifically labeled “Scans.” Click on it to proceed to the scan settings.
Step 4: Locating the “Scheduled Scans” or “Automatic Tasks” Setting (Where the Magic Happens)
Now you’re getting closer to setting up your automated scans. Look for a setting that allows you to manage scheduled scans or automatic tasks.
- Find “Scheduled Scans” or “Automatic Tasks”: The exact wording might differ based on your Norton version in April 2025. You might see a section titled “Scheduled Scans,” “Automatic Tasks,” or something similar. Click on this option to configure your scan schedule.
Step 5: Configuring Your Scan Schedule (Setting Your Preferences)
This is where you tell Norton when and how often you want it to run scans.
- Enable Scheduled Scans: If scheduled scans are not already enabled, you’ll likely see a toggle switch or a checkbox to “Turn On Scheduled Scans” or similar. Make sure this option is enabled.
- Set the Scan Frequency: Choose how often you want Norton to run a scan. Common options include:
- Daily: A scan will run every day.
- Weekly: You can select a specific day of the week for the scan.
- Monthly: You can choose a specific day of the month for the scan. Select the frequency that best suits your needs and how often you typically use your computer. I personally prefer a weekly full scan.
- Set the Scan Time: Specify the time of day you want the scan to run. Choose a time when you are less likely to be actively using your computer, as a full scan can sometimes consume system resources. Many users opt for overnight or early morning hours.
- Choose the Scan Type: Norton usually offers different types of scans:
- Full Scan: A comprehensive scan that checks all files and folders on your system. This is the most thorough option and is recommended for scheduled scans.
- Quick Scan: A faster scan that checks commonly infected areas. This is good for quick checks but might not catch all threats.
- Custom Scan: Allows you to select specific drives or folders to scan. This is useful for targeted scans but not ideal for regular full system checks. For your scheduled scan, select “Full Scan” for maximum protection.
- Apply or Save Your Schedule: Once you have configured your desired frequency, time, and scan type, click “Apply,” “Save,” or a similar button to save your scan schedule.
Step 6: Reviewing and Managing Your Scheduled Scans (Ensuring Everything is Set)
After setting up your schedule, it’s a good idea to review it to ensure everything is configured correctly.
- Go Back to the “Scheduled Scans” or “Automatic Tasks” Section: Navigate back to the section where you configured your scan schedule.
- Verify Your Settings: Check that the frequency, time, and scan type you selected are displayed correctly.
- Edit Your Schedule (If Needed): If you need to make any changes to your schedule, simply click on the settings again and modify them as required.
- Consider Additional Options (If Available): Some versions of Norton might offer additional options for scheduled scans, such as the ability to run the scan only when the computer is idle or to automatically apply fixes found during the scan. Explore these options if they are available and adjust them to your preferences.
My Personal Insights on Scheduling Norton Scans
I’ve found that scheduling regular full scans with Norton is a proactive way to maintain a secure computer. By setting a schedule that runs automatically during off-peak hours, I don’t have to remember to manually initiate scans, and I can be confident that my system is being regularly checked for threats. It’s a simple yet effective way to enhance your overall cybersecurity posture in April 2025.


