Unlocking your Samsung Galaxy phone with your fingerprint isn’t just a fancy trick—it’s actually one of the quickest and most secure ways to access your device. If you haven’t set it up yet, or if you just want to fine-tune it, this guide will walk you through everything step by step.
Why Use Fingerprint Unlock?
There are a few solid reasons to make fingerprint unlock your go-to method:
- Speed: No typing or swiping patterns. Just a quick touch.
- Convenience: It’s always right at your fingertips (literally).
- Security: Your fingerprint is unique to you, which makes it tough for anyone else to get in.
- Extra Uses: Beyond unlocking, it can be used for logging into secure apps or making payments via Samsung Pay.
Understanding the Fingerprint Sensor Types
Depending on your model, Samsung uses two main types:
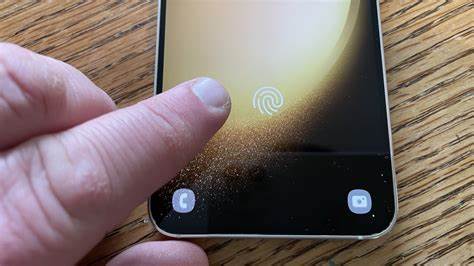
- Ultrasonic In-Display Sensors: Found in newer devices like the Galaxy S10 and up. The sensor is under the screen.
- Capacitive Physical Sensors: These are on older or budget models. You might find them on the back, side, or home button.
The setup is mostly the same, but the finger placement spot will vary.
Setting Up Fingerprint Unlock on Samsung Galaxy
Let’s go through this in order, starting from scratch:
Step 1: Set a Secure Screen Lock (If You Haven’t Yet)
You’ll need a backup security method like a PIN, pattern, or password before you can use fingerprint unlock.
- Open Settings: Swipe down the Quick Settings panel and tap the gear icon, or find Settings in the app drawer.
- Go to Security Settings: Tap on Security and privacy (older models might say Biometrics and security).
- Choose Screen Lock Type: Tap Screen lock type.
- Set Your Backup Method: If prompted, choose and set up a PIN, Pattern, or Password. Don’t forget it—you’ll need it if fingerprint recognition fails.
Step 2: Register Your Fingerprints
Once the backup lock is in place, it’s time to add your fingerprints.
- Back to Security Settings: Return to Settings > Security and privacy > Biometrics.
- Select Fingerprints: Tap Fingerprints. Enter your PIN, pattern, or password to proceed.
- Add Fingerprint: Tap Add fingerprint.
- Follow the Prompts:
- In-Display Sensor: You’ll see a screen prompt showing where to place your finger. Keep lifting and pressing slightly differently until it hits 100%.
- Capacitive Sensor: Place your finger repeatedly on the physical sensor until the registration is complete.
- Complete the Scan: You might need to adjust the angle to get the edges of your fingerprint.
- Add More for Convenience:
- Your main unlocking finger (probably your thumb).
- Another finger from your other hand.
- Multiple angles of the same finger (optional, but helpful).
- Tap Done when you’re satisfied.
Step 3: Turn On Fingerprint Unlock
Make sure fingerprint unlock is actually activated.
- In the Fingerprints menu, find the toggle next to Phone unlock (sometimes it might say Screen unlock).
- Make sure it’s switched ON. It usually is by default, but it’s worth double-checking.
Managing Fingerprints
You can always go back and tweak things later:
- Go to Settings > Security and privacy > Biometrics > Fingerprints.
- Authenticate: Enter your PIN, pattern, or password.
- Edit Your Prints:
- To rename: Tap on a fingerprint, then give it a name like “Right Thumb.”
- To delete: Tap the fingerprint, then hit Remove or tap the trash icon.
Tips for Better Recognition
- Keep It Clean: Dirty fingers or smudged sensors reduce accuracy.
- Cover the Whole Sensor: During registration, move your finger slightly each time.
- Register Multiple Angles: It helps with off-center unlock attempts.
- Apply Even Pressure: Try to use the same touch style each time.
- Trouble? Re-register: If one finger’s always hit-or-miss, delete and redo it.
Wrapping Up
Fingerprint unlock adds speed, security, and just a bit of tech magic to your everyday phone use. It takes only a few minutes to set up, and it makes unlocking your Samsung Galaxy a breeze.